Feeling Inspired – Mixed Media Backgrounds

I started my day with a great walk (almost 2 miles – I’m so proud of myself). I returned home feeling invigorated and very inspired.

So, of course I headed to my craft space and got out some mixed media supplies!

I started with some heavy weight mixed media paper, a few stencils and modeling paste. I used two stencils per sheet to vary the texture and design. You don’t have to be perfect and fill in every area with paste. The idea is texture so be random for a more organic feel. No perfect straight lines or even exact shapes needed here.

After the modeling paste was dry I added a quick layer of Gesso to ready my paper for color. This makes sure your coloring supplies go on smoothly and react evenly. A good example is Gelotos – they are a waxy stick of pigment that you can scribble on your page then blend in with water or a baby wipe. If you don’t Gesso first, the scribbles will soak into the paper and you will not be able to totally blend them out – you will see the scribble marks. You may want that affect and that’s great but I like it to blend out. Also, your mediums will react differently on the paper vs the modeling paste giving you uneven coloring. Again, you may like that look but I don’t. If you Gesso you get an evenly reacting surface and that’s what I like.

That is one of the awesome reasons I like mixed media – the variety of processes and techniques that you can tailor to your own likes to achieve your own style. There really aren’t many rules in mixed media (other than color theory – don’t make mud), anything goes so have fun. Try something new. Be bold. Be brave. If it comes out ugly just Gesso over it or throw it away – it’s only paper and you have learned what doesn’t work or what you don’t like. And I’ll bet you had fun along the way even if you don’t like the result.

I had so much fun with the color! This first one was done with Faber Castel Gelotos applied directly to the sheet. I then spritzed with water and blended in the colors with a brush. When dry, I spritzed with some pearl Tattered Angels glimmer mist.

A close up showing the pearl glimmer mist.

The next one I used three different blues from my Magicals collection. I sprinkled on the powder and spritzed with water tilting the paper around to get the colors to run and blend. I’m pleased with the results – but really, how can you go wrong with blue?

A close up showing the awesome affects you get with the Magicals.

The third one, I again used the Magicals but this time I went with yellow with a bit of orange. One of the yellows had green in it so there is tint of green in the mica shine. I sprinkled on three colors, spritzed with water and tilted the paper to move and blend the colors. I dried it a bit with my heat gun and added another layer in the same manner.

Magicals are awesome!

The last sheet I did using sprays. I had two lovely reds but after applying them there really wasn’t much variation in the color. I had some pink sprays but I didn’t want to lighten the page, I wanted to keep a vibrant rich red so I turned to my Magicals again and chose a great brown that came out coppery on the red. I love the result. I think this one is my favorite!

You can see the copper here but I couldn’t get a good shot of the shimmer in that copper. ☹️

I had so much fun working on these backgrounds today I loved playing with all the lovely bright colors that signify spring to me. Now to decide how to use them? There will be at least one set of ATC’s but I’m not not sure about the rest. Any suggestions? Leave me a comment below if you have some ideas.

Thank you for stopping by and spending a few moments with me today. Thank you for letting me share my creativity with you. Please let me know in the comments below if you have any questions about procedures or products used today. I would also love to know which one is your favorite and why? Leave me a comment to tell me.

If you haven’t already done do, I would love for you to follow me on WordPress or via e-mail so you don’t miss anything. Next up I will be using these great backgrounds. Don’t you want to see how they end up? If you like my post, please give it a like and share it with someone else who may enjoy it.

Thank you again my friends. Til next time – happy crafting!

Jeanette

Day 57 of #100day project – 90th Birthday Card

Hello Everyone – have you signed up for your chance to win a $500 shopping spree from Joanne Fabric & Craft? If not, check out yesterday’s post for all the details. If you use my link you get a 2 minute advance notice, then can in turn share to get additional advance notice time. Don’t waste any time so you don’t miss out. Good luck to you all.

For today’s project, I was contacted by a favorite customer with a request for an extra special birthday card for a special friend turning 90. Well that is certainly a grand number and requires a stand out card. The birthday girls favorite colors are pink, purple and blue and she likes flowers. If you know me, you know purple is my favorite color so I tend to make a lot of purple cards and things so I decided to go with pink (I’m sorry my pictures look peachy to me but the card base is a soft dusty pink).

I chose one of my Tattered Lace die sets that I got a while ago from Createandcraft.com for the lacy look. I cut a pink base at 12″ x 8 3/8″ and scored on the long side at 3″ and 6″ for a gatefold card. I cut my mat layers from an old DCWV pad called Midnight Berry. I chose a deep pinky purple and gold sheet that really gives an elegant feel to the card. The lacy pieces were cut from white card stock.

I cut the circle mat from the same patterned card stock and attached it to left side gate. I embellished with some fern pieces from a K & Company pack I had, a lovely pink flower and a blue butterfly from my stash.

For the inside I lined it in white, then used dies from my stash to cut the sentiment. I have no idea where I got the number dies from and the Happy Birthday was probably from Spellbinders. I cut everything twice out of pink and once out of the patterned gold paper. I stacked them all together so they have a slight pink shadow and it gives a bit of dimension by layering. I cut some extra “birthday”s and cut out the “th” for the 90th. I also used one of the circle dies from the set I used on the front and cut it equally into 4 pieces to accent the corners of the interior.

I used my envelope score board to make a matching pink envelope. Since I knew the card was going to be hand delivered I could add dimension so I used 1 large and 2 small matching pink plowers. Then I used both decorative circle dies from the same set as the card front and cut them out of the same gold patterned paper and added them to the corner of the envelope to mimic the card interior corners.

I am so pleased with this card – I just love it! I almost didn’t want to sell it. I hope my customer and the recipient both like it as much as I do.

Thank you for stopping by and spending a few moments with me today. Don’t forget to sign up for the $500 Joann contest if you haven’t already done so – there is still time – here is the link. I would love for you to like, comment and/or share this post with someone who might enjoy it. Don’t forget to click the follow button or sign up for e-mail notification so you don’t miss anything. Thanks so much.

Til next time – happy crafting everyone!

Jeanette

Win a Joann’s $500 Gift Card

Who wouldn’t love to have $500 to spend at Joann stores? OMG – can my craft room hold all the card stock I can buy for $500? It would, but I would have to kick out my mom and I don’t really want to do that. Maybe I will get a new Cricut machine?

What would you buy? Comment below and let me know what your secret hearts desire is. What would you buy at Joann Fabric & Craft if money were no object?

Joann Fabric & Craft is offering a chance to win $500! Here is your link to register. By using this link, you get a two minute advance notice to respond and try to win a prize.

Thank you and good luck everyone. And don’t forget to let me know if you win!

Til next time, happy crafting,

Jeanette

Purse/Gift bags. Days 54, 55 & 56 of #100dayproject

Yes I am still plugging along with my #100dayproject and I have done a few bigger projects that I still need to write up to share with you all (or should I say “y’all” since I do live in Texas now?). I got discouraged because my head was bad for so long (my doctor gave a 12 day series of steroids and that finally ended that bad cycle – thank goodness). Then I was discouraged because I was so far behind, THEN I had computer problems. Ugh! Let’s face it – I was just a mess! Lol

So I reminded myself that I knew right from the beginning that I would not be able to complete 100 days of projects in a row. I said I would do 100 days no matter how long it took so I will just plug along and do what I can, when I can.

Ok – confession time: I LOVE watching crafters on YouTube and can waste many hours in front of the television getting all excited to create. Well, a few weeks ago while dog sitting at a non crafty home, I found a new paper crafter that I am obsessed with – The Posh Paper Lady! I spent over two entire days watching her videos – yes I said TWO ENTIRE DAYS. She makes beautiful, elegant, and as she says “next level” projects. And they are definitely next level in quality and beauty but not hard to recreate. Her tutorials are fabulous and not too long. She had me so excited those first few days and I was going crazy because as I said I was at a non crafty home so I couldn’t create anything!! I was so itching to do some of her projects and I had nothing to create them with. I can’t say enough good things about her and her videos so go check her out for yourselves at the link above.

I have been working on my version of her small handbag which measures 5″ x 6″ x 2″. I just made a few minor changes – like the handles (which I took from one of her other projects). I will explain the basics of what I did but please check out her video for a great detailed tutorial here. I changed the handles as I did not have any chain with me to complete the handles as Sherry did. Sherry’s focus for this bag was branding and I am working on a logo that I can add to my bags – like you see on designer purses. Sherry also shared a great tip for selling – offer the bag free with a large or bulk purchase. This bag holds A2 cards perfectly – I think I will offer the bag free with purchase of 10 cards – or maybe a bakers dozen – I’m not sure yet, I need to talk to my business advisors (aka my mother and sister).

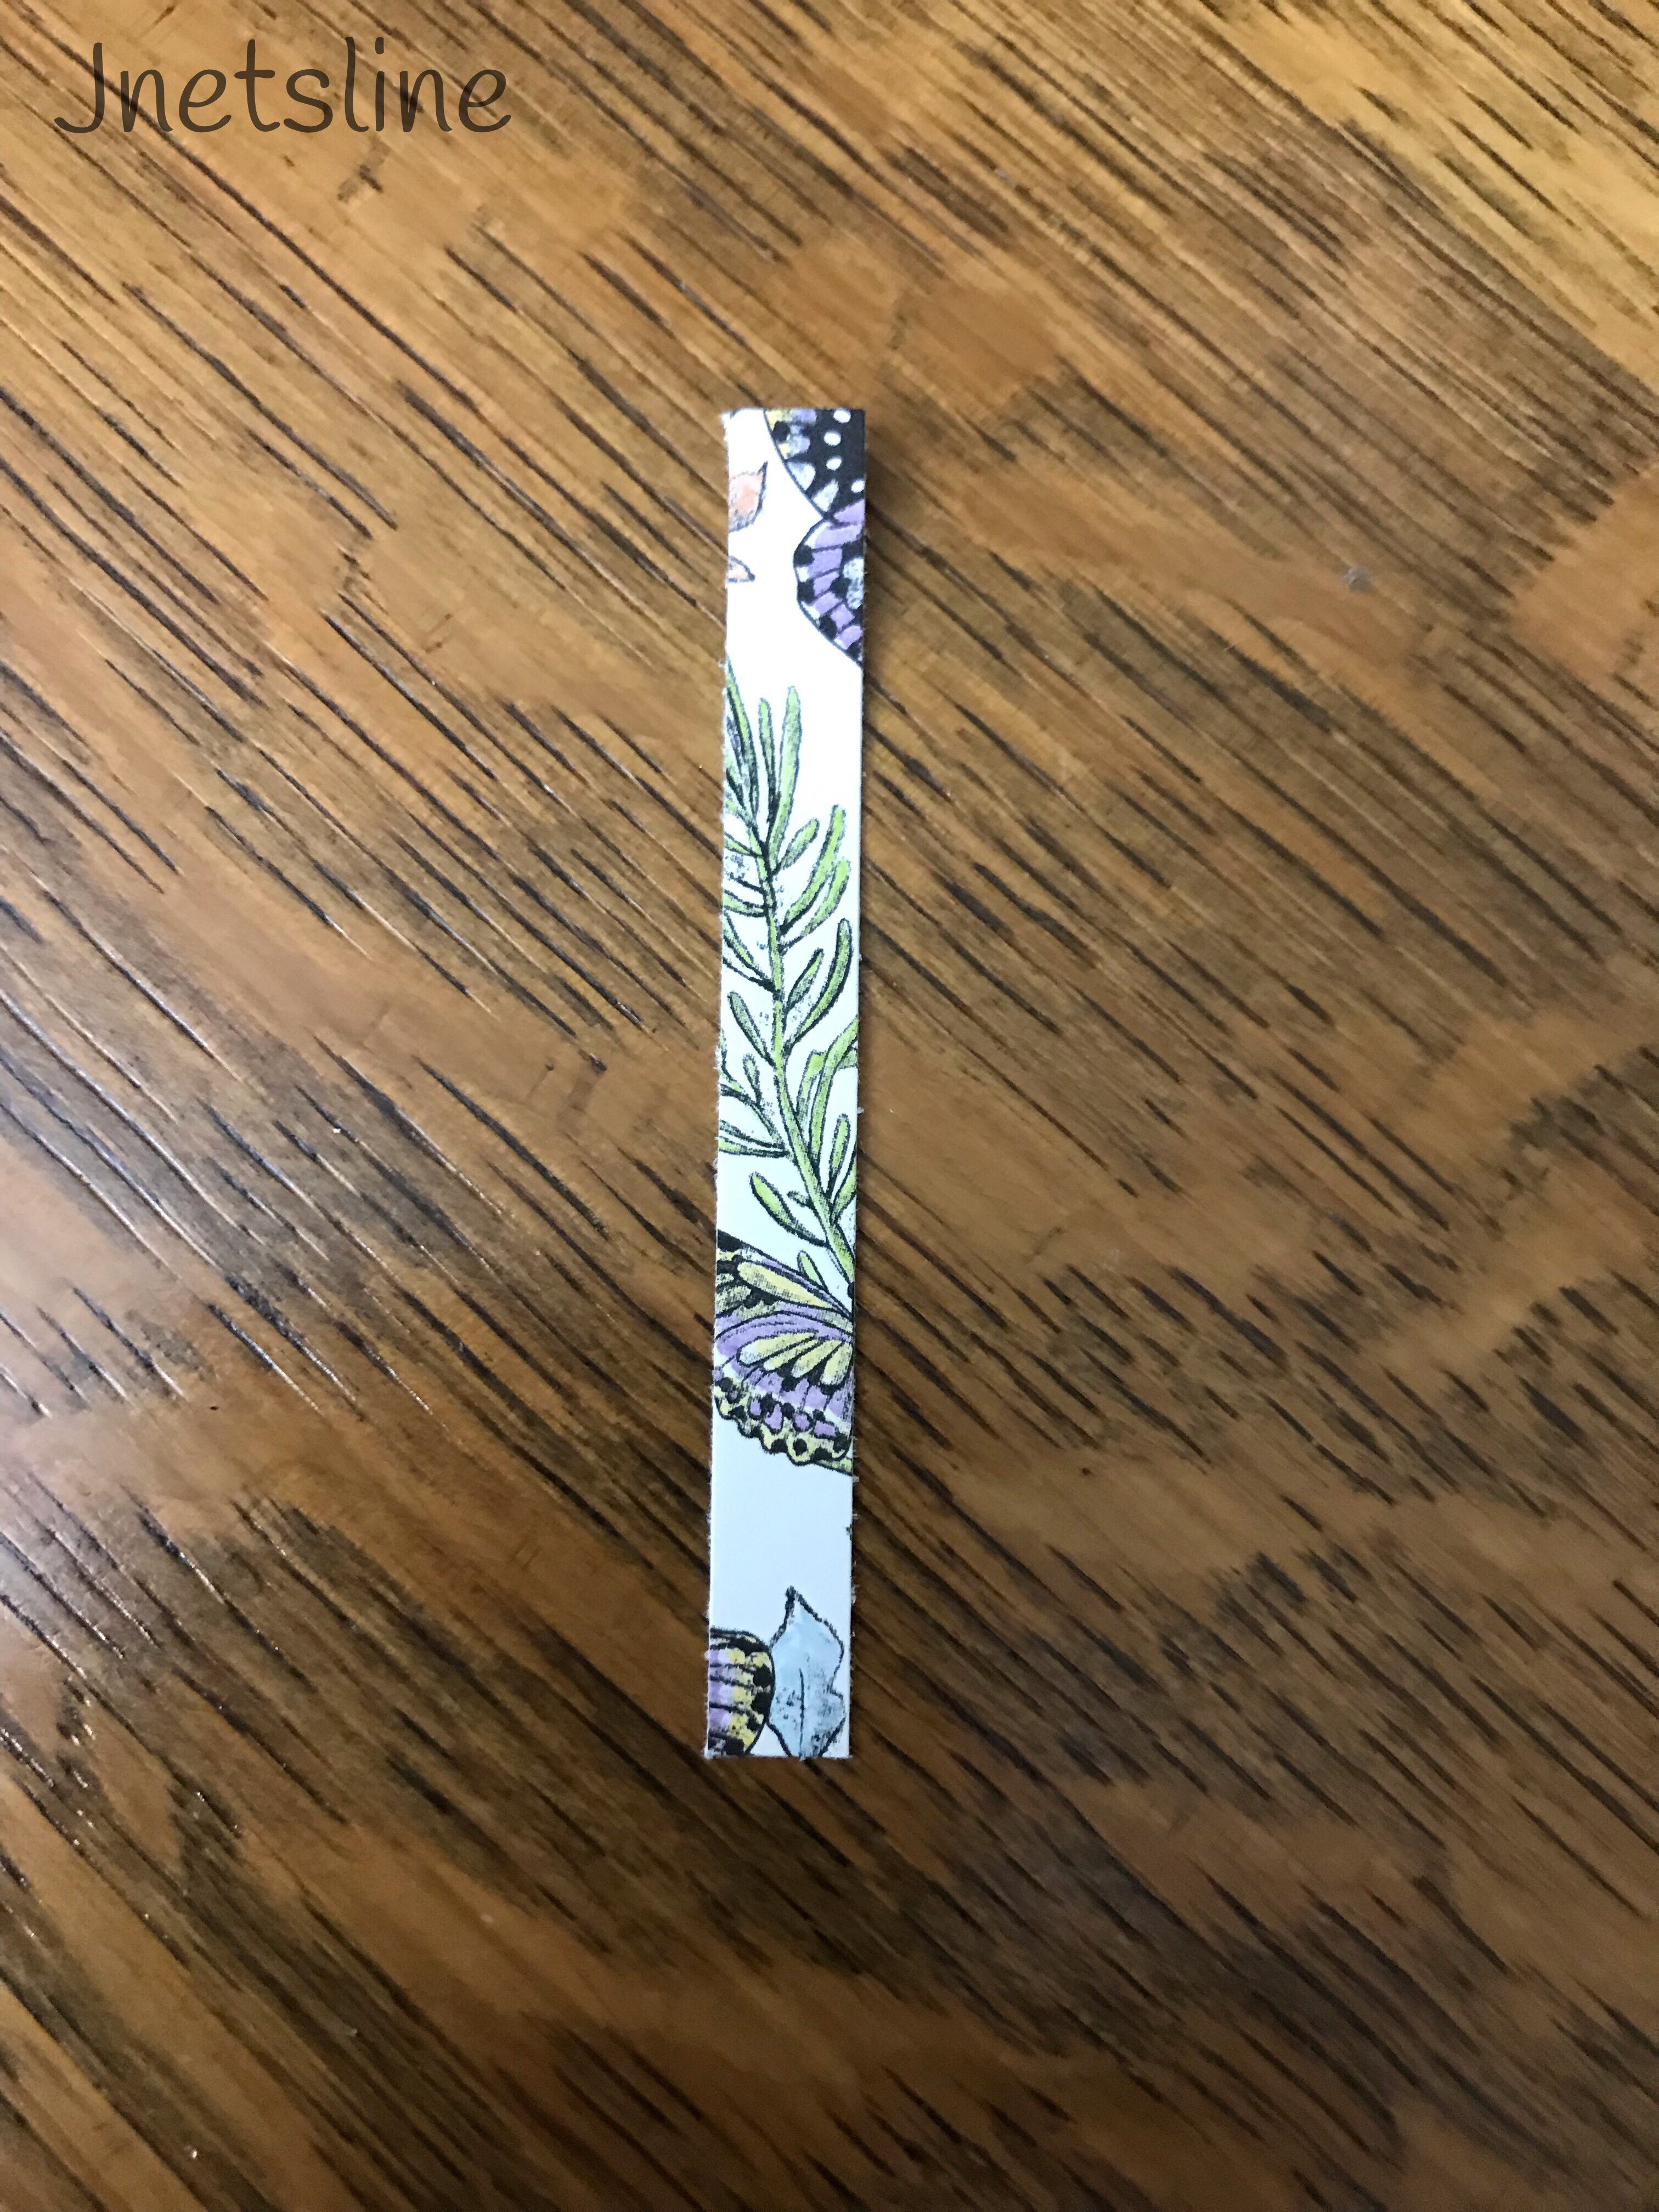
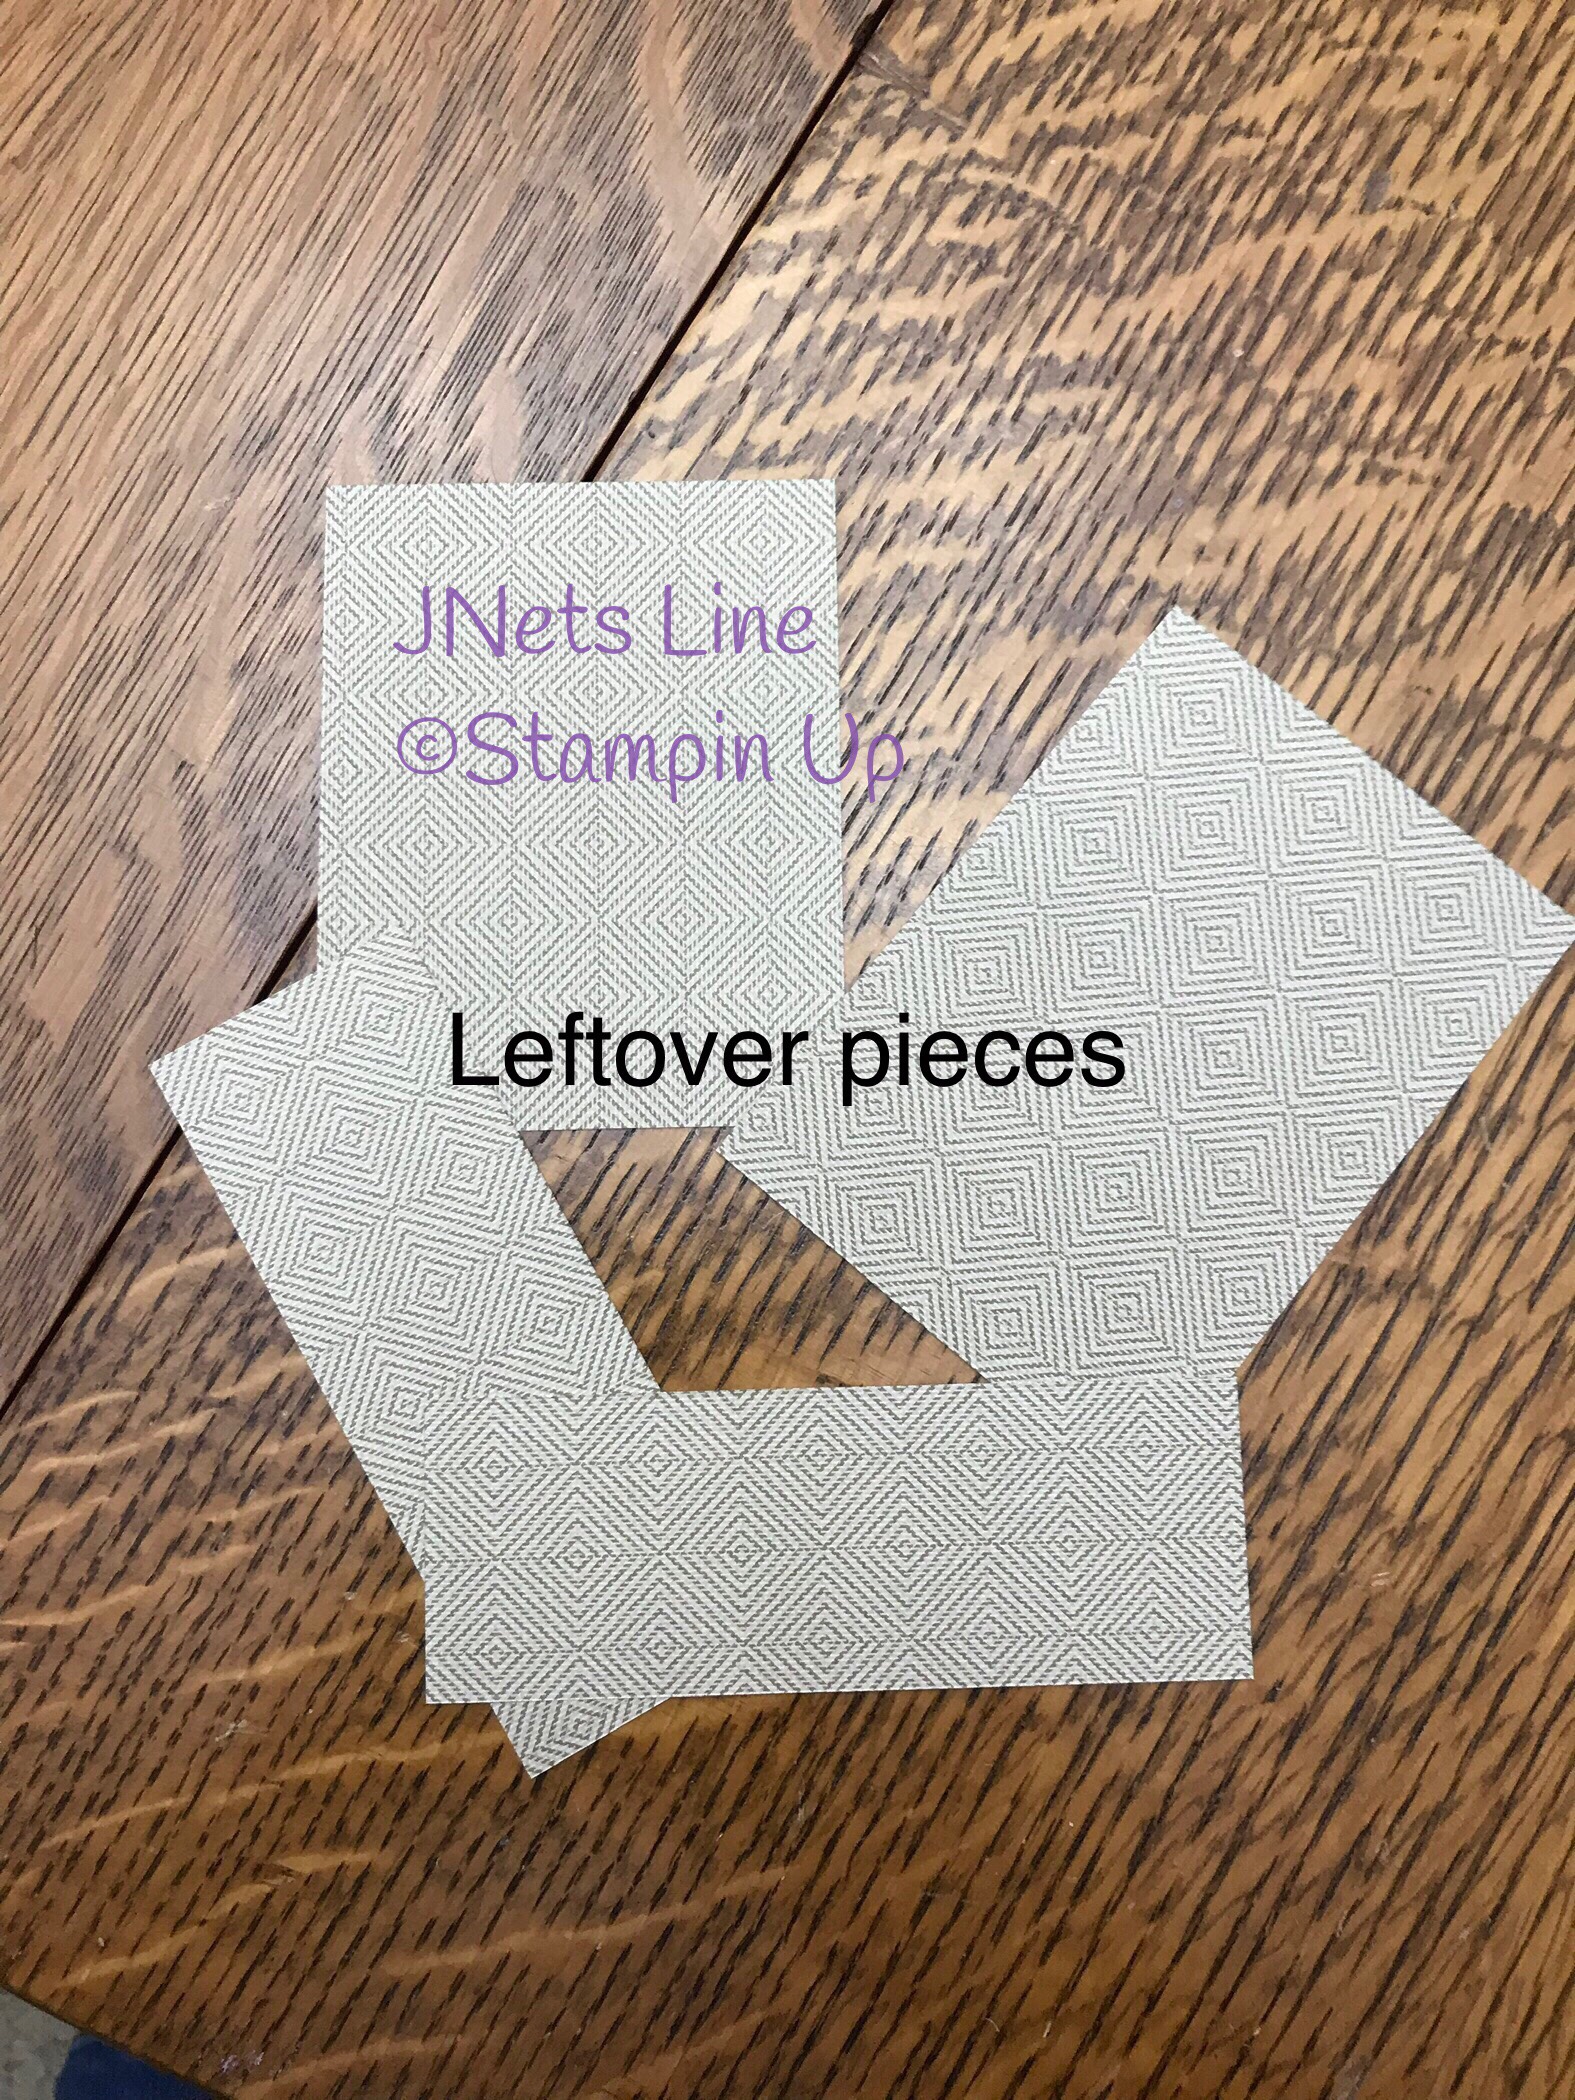
I reworked her pattern a little bit so that I could get the entire bag out of only two 12″x12″ sheets of double sided paper with minimal leftover – this is all I had left:

You really want quality paper or card stock – I had a lot of trouble with the lavender polka dot bag – a lot of cracking and peeling – so much that I won’t be able to sell it. Your name is only as good as your product so it’s not worth selling (or trying to sell) an inferior product. The bag with the blue trim had a directional design on the A side and the B side was non-directional and I made my pattern work fine. The difference from Sherry’s is the the liner on the bottom of my bag is not the B side, her inside is completely the B side. I’m ok with it being different on the bottom. Sherry also put an extra layer of chipboard in the base – I didn’t as I am only putting cards in my bags and I think the single layer is sufficient for my needs.

One great tip I learned from Sherry was to burnish your glue – after glueing pieces together, flatten your bone folder and burnish well. I didn’t think it was a big deal when watching her do it but once I did it myself, I am totally sold! It spreads the glue really well and squishes out any excess so you get a really smooth classy finish with no bubbles or wrinkles and a really good adherence. I promise it is a worthwhile step. Supplies and directions are below.

I hope you like my project today – let me know what you think – I would love to hear from y’all. I would really love to see the results if you make a bag or two for yourself. Please share my post with your crafty friends if this is a project they might enjoy. And if you haven’t already done so, click the follow button so you don’t miss a thing. Thanks for stopping by and spending a few moments with me today, I really appreciate it.

Til next time, happy crafting!

Jeanette

SUPPLIES AND INSTRUCTIONS:

Supplies I used:

Two sheets of double sided paper (I used Stampin Up DSP)

8 brads – 4 to attach the handles and 4 for feet (Sherry mostly uses flatback pearls or actual purse feet)

Chipboard – you can get enough pieces to make 2 bags out of one 12″x12″ piece

Glue and strong double sided tape if desired. Sherry used both – I did it all with tacky glue. I have some Reptile glue on order (it’s Sherry’s favorite) and I can’t wait to try it.

Embellishments as desired. I will add my embellishments when I get home. I’ll post an update when they are all decorated.

Tools I used: paper trimmer, scoreboard, Crop-a-dile, bone folder – and a ruler & pencil for marking.

INSTRUCTIONS:

Ok, let’s get started. You need chipboard cut to: one piece at 2″x6″ and two pieces at 5″x6″. So make a cut at 6″, then each 6″x12″ piece will be cut at 5″ and 10″ giving you the 3 pieces needed leaving the other 6″x12″ piece to make another bag.

Both sheets of paper are cut the same. Cut each at 7 1/2″ and 10 1/2″ giving you 12″ strips measuring 7 1/2″, 3″ and 1 1/2″. If your paper is directional you need to put your paper in your trimmer right side up with pattern upright as you are looking at it.

Next you need to glue the 7 1/2″ strips together end to end, I overlap about 1/2″. This long strip will be the front, bottom and back of your bag. My tip: if your paper is directional, glue the bottoms together so your pattern is going out to the right and left from center. The join will be the center bottom so you won’t see that the directions don’t match but when you fold them up, both the front and back of your bag will be upright (the back won’t be upside down). Now cut 4 1/2″ off of each end. (In my picture above, I had already cut off these pieces). These end pieces will be your front and back liners and need to be cut down to 5 7/8″ x 4 1/2″. The pieces cut off will be excess and not used in this project.

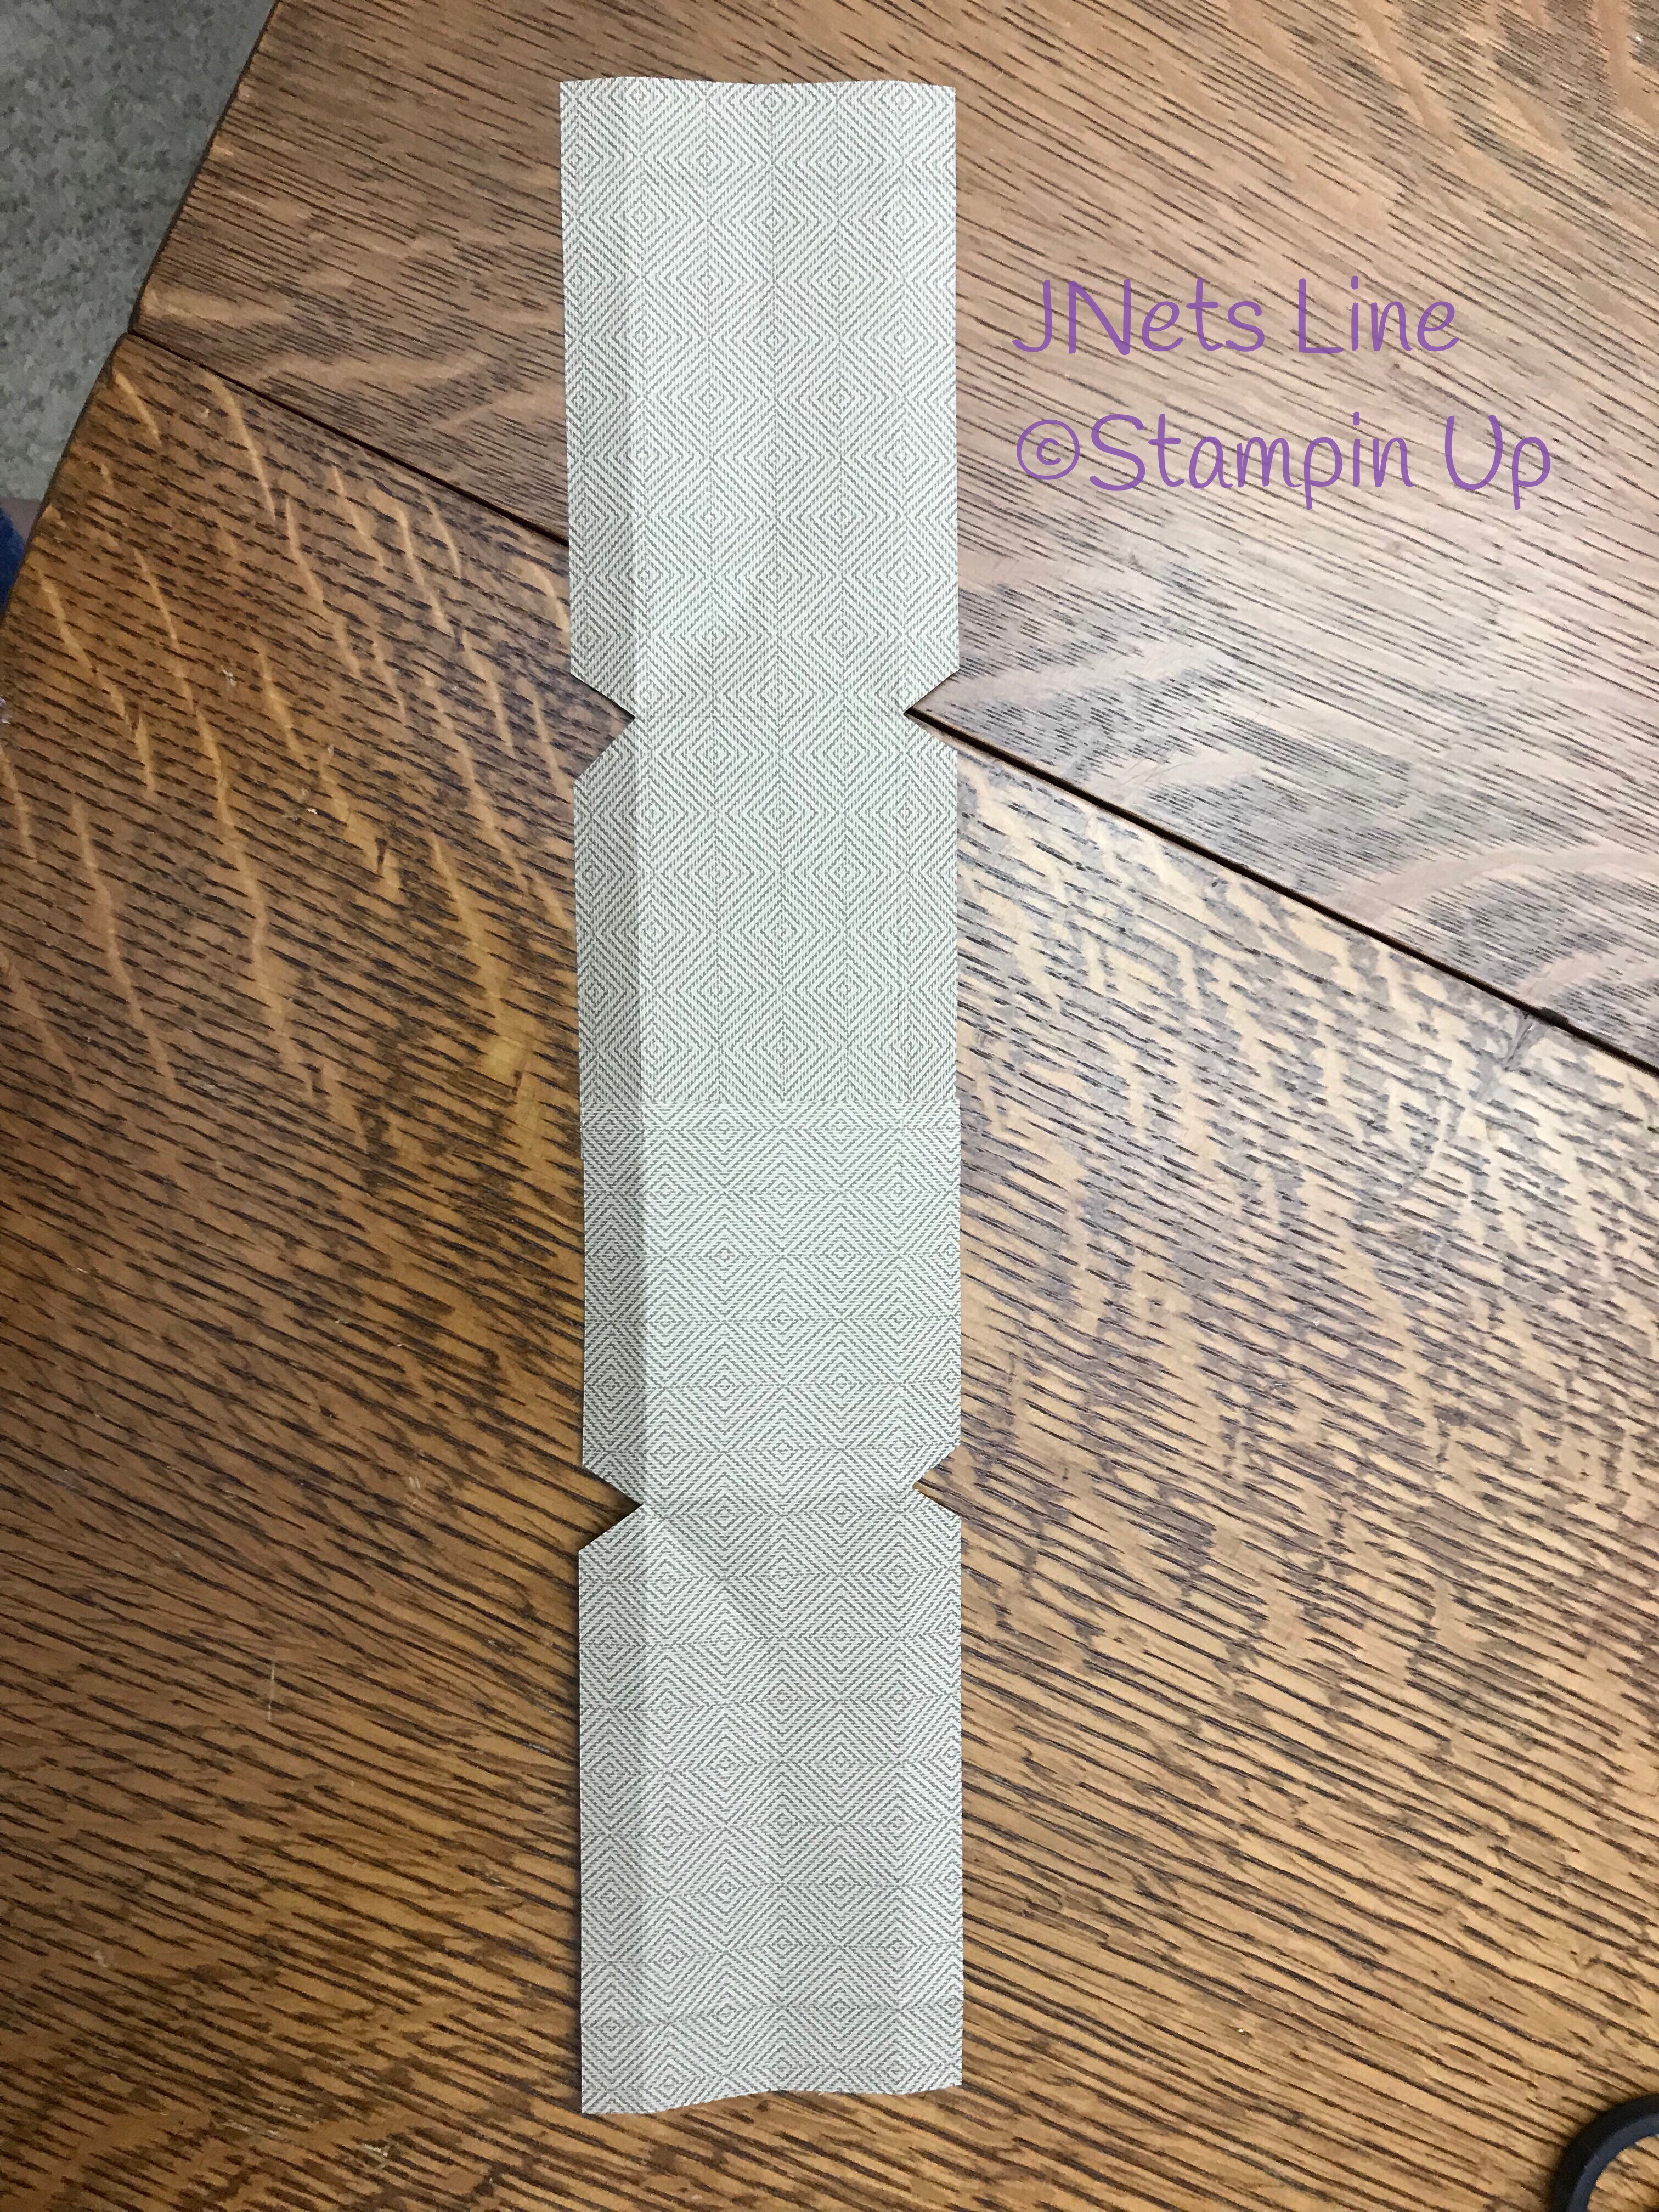
Now we work on the 3″ strips. This seems really involved but it’s not, I promise. Ultimately you will glue them together and cut a 15 1/2″ piece – this will be your side gussets and your bottom liner. Since you can’t fit a piece that long in your scoreboard, it’s easier to do your long scores first – on the 3″ side score at 1/2″ and 2 1/2″. Now you can glue the strips together end to end – you will be focusing on the B side now so if that is directional, glue the bottoms together as above. If the join on the inside bottom of your bag bothers you, then you need to follow Sherry’s tutorial. This piece needs to be cut to 15 1/2″ with the join in the middle. I can’t give you an exact cut line as it depends on how much you have overlapped at your join. The pieces cut off the ends will be excess and not used in this project. The join does not need to be exact center. Now you need to score the ends. Along the 14 1/2″ side score at 3/4″ and 4 3/4″, turn the strip around and score the other end the same way. Now you need to score down the center of the gussets so the bag will fold in on the sides. On the 3″ side you need to score at 1 1/2″ from the end of your strip down to your 4 3/4″ score line. I added additional triangular scores so the side will fold in like a lunch sack. This is not necessary but I like the look better. On the center gusset score you just made, measure down 3 1/4″, then connect that mark to your 4 3/4″ score where it meets the side scores and score that angle, then connect center mark to the other side score. Now repeat on the other end. You can see these angle scores in the 2nd and 3rd pictures below. you need to clip notches at the 4 3/4″ score giving you 3 tabs on each side. See below. Fold over the 3/4″ end pieces to the A side, glue and burnish. Put this aside.

Now the 1 1/2″ strips need to be cut to four 6″ strips: two for the handles and two for the trim across the top front and back of your bag. Two of the strips need to be scored at 3/4″ lengthwise – these are the trim strips. The other two need to be scored lengthwise at 1/2″ and 1″ – these are the handles. Fold and burnish the scores on your handles, add glue to the outer edges and fold into thirds, burnish well to spread all glue and get all edges adhered. While the glue is still wet, shape your handles by running them along the edge of your desk or pulling them between thumb and bone folder to get them to bend a little. Set these aside.

Now we work on the 7 1/2″ strip. If you have made mini albums, this will be familiar to you – it’s just like the spine and covers of a mini album. Glue the 2″ strip of chipboard to the B side of your paper along the join, then adhere the other pieces to either side of this leaving a gap of about 1/8″. Burnish the paper well to the chipboard. To help try to prevent cracking, I run the tip of my bone folder around the chipboard, in effect scoring the paper. Then gently start bending the paper up and over the chipboard. Miter your corners. Glue and adhere the top and bottom edges, burnishing well. Repeat for the ends.

Time to add the brads to the bottom. Measure and mark holes 3/8″ in from end and 5/8″ from center. Or, if you are as good as Sherry, just eyeball them. I am not good at that & need to measure. Punch or poke your holes. Add a dot of glue to holes and add the brads, opening on the inside. **Please be careful with your brads. I cut myself on one and bled on one of the bags making it unsellable ☹️.

Now we need to attach the 3″ strip, covering the brads. Add glue to the B side center 6″ (between score lines) and attach to the 2″ piece of chipboard. Be sure to center it on all sides – fold over the gusset and align the fold to the edge of chipboard. When the glue is set, add glue to the three tabs on one side of the gusset/liner. Folding up the front of the bag, attach the bottom tab first, then the sides. Lay the bag over so you can burnish glue well. Repeat for the other side.

Next, add glue to the A side of the liner pieces and slide them in along the front and back of the bag. Lay bag over so you can burnish well.

Now we will add the trim to the top edge of the bag. Slightly notch the inside edge of trim so it won’t interfere with gusset.

Mark the trim where to attach handles before attaching it – it’s much easier while flat on the table. I measured 3/8″ down and 1″ out from center so handles are 2″ apart. My tip is to only adhere the outside of the trim pieces at this time so you can add the handles with the brads and cover the back of the brads with the inner trim piece. Punch or poke holes in bag and end of handles about 3/8″ in and centered. Add a dot of glue to handle holes and insert brad, attaching to bag. Curve handle around and attach the other end to same side of bag. Repeat for the other side. Glue down the inner trim pieces, burnishing well. Embellish as desired. And that’s it! Please let me know if you have any questions and please share pictures of your bag – I truly would love to see them.

You can see where I notched the inner trim piece too much on the above bag ☹️. It’s ok because this the the one I bled on so it can’t be sold. Just a note to give a small notch and test fit – you can always take off more but you can’t put any back.

Happy crafting and if you didn’t do it already, don’t forget to check out The Posh Paper Lady on YouTube – you won’t be disappointed.

Days 44-46 of #100dayproject – July 4th Sampler

Hello everyone! Firstly I want to apologize for my absence. I have been struggling with my chronic migraines for the last 5 weeks or so. My normal daily pain is usually a 1-3 on a pain scale of 10 with frequent spikes, but recently I have been stuck in a pain cycle with daily pain of 5-6. This level of pain makes it very hard to feel creative, and fighting this level consistently for 5 weeks is very exhausting, frustrating and depressing – which also leads to lack of creativity. My neurologist has put me on a 12 day course of steroids to try and break the cycle of pain – fingers crossed!

Ok, enough of that nonsense. In between pain and dog sitting at non crafty homes, I have been working on two projects. I can’t work long enough to complete anything in a day but I am plugging along. One project is a wedding travelers notebook for my soon to be step niece. It’s almost done and I hope to post it soon. The other project is a July 4th sampler for my mother. If you follow me you remember my Mothers Day sampler. Click here if you haven’t seen it and want to check it out. Well, I told you Mom was practical and would probably want to use the frame for other celebrations too – sure enough, she asked for a July 4th sampler.

I had fun creating this while cat sitting for my lovely friend Fern (who, by the way has the cleanest and most organized craft room ever! It puts mine to shame for sure!). She had a few pieces of loose sheets of patriotic paper that were perfect. Then I used real red and night of navy cardstock from Stampin Up as accents.

The only thing I knew I wanted was to cut out the July 4 letters with the large letters dies from Stampin Up. I cut them from the patriotic paper and from night of navy – then I glued them together offset for a shadow affect. I added some candles to the top of that panel because, after all, it is the birthday of our independence and what’s a birthday without candles?

Then I looked through Ferns Stampin Up stamps and dies for things I could use to symbolize Independence Day. I wanted to make a sparkler using the starburst swirl from the Star of Light set that I used in the background of this card. I thought it would be perfect in embossed silver as the trail of sparkles from the sparkler. Unfortunately I could not find any silver embossing powder. 😕

https://jnetsline.wordpress.com/2019/05/28/day-40-of-100dayproject/

So I turned to the Swirly Scribbles dies. I used the wavy one to make the flag. I love how it looks like the flag is blowing in the wind. I punched a few stars and helped them pop with some white gel pen around the edges. I used the round swirl dies to symbolize fireworks. I added a few silver stars to further the affect.


The word “Celebrate” was a perfect choice of course. And then I saw the T-shirt builder set! Who doesn’t have a patriotic shirt to wear for the holiday?

The ballon punch was an obvious choice. I added stars and some bakers twine for a great look. The Call Me Cupcake framelits made a great patriotic sweet treat.

Lastly, I had to wait til I got home because I had the perfect supplies to make rockets to finish off my sampler!! I used red & white paper straws for the body and I had gotten a box of decorative toothpicks at a yard sale (you know, the kind you put in sandwiches or maybe fruit or cheese). I had red, blue and gold but I went with the red for “The rockets red glare”. Then I punched some circles, cut out a wedge and used a ball stylus on a foam pad to start the curl and glued them into a cone shape. I glued them together with tacky glue and got fabulous rockets!! I am so pleased with how they came out.

My favorite part of the project was giving it to my mom! She was so pleased and excited she was almost dancing. I loved the smile on her face. That is why I like crafting and creating – I love to make people happy, or feel good, or cared about. Mom was so excited, we had to move the frame. We had hung it in the entryway at the front door so guests would see it, now she wanted it where WE could see it all the time! Now it has an honored place in the dining room.  Not sure yet what I will create for the next sampler for our shadow box frame – any suggestions?  I know I have to create a Halloween one and a Christmas one but there must be something I should do before then………  I really would appreciate any suggestions.

I hope you like my project today, and if you did please give it a like and share it with someone else who might enjoy it. Maybe I inspired you to create your own sampler – if I did, I would love to see what you create – share it on my Facebook page. Please leave me a comment if you have any questions about my project or if you need a referral to a Stampin Up demonstrator.

Thank you for stopping by today and sharing a few moments with me. If you haven’t already done so, don’t forget to click the follow button or sign up for e-mail notification so you don’t miss any of my projects. A special thank you to Fern for allowing me to use her scrap room and supplies to create this great sampler. Fern, I can’t wait to sit for your cats again!

Til next time, happy crafting everyone!

Jeanette

Day 43 of #100dayproject

I finished my assignment with the puppy and I miss her terribly -if you haven’t already seen them – check out my Instagram for some cute photos of her! I am now sitting for a very shy cat and two VERY LARGE huskies. They love to sing to me and I can’t help but laugh every time. Here’s a couple photos of them:

This is what I found when I went to bed last night:

They have so much personality, they crack me up!

Now on to the bad news – their mom is not a crafter! I don’t know how people live without crafting?! I think I am going to make it a prerequisite of future dog sitting jobs “There must be a craft room that I can use while sitting”. Only kidding. But this does mean I am restricted in what I can do and post about. I always have my knitting with me to work on but the project is not finished so I can’t post about it yet. I also make my origami balls while sitting but I have already told you about them, so I can’t post about that again (if you haven’t seen it, check out my prior post day 30). All this only boils down to the fact that I won’t have many posts for the next two weeks. 😞

I am only one town over from home so I was able to go home today for a few hours. It was so nice to get some lovins from my cats. I miss them a whole lot and a bunch, but I know Mom and Dad are loving them and taking good care of them.

When I got home I had received a card from a very special friend who has always known how to make me smile. It inspired me to make today’s card.

I started with a piece of mixed media paper and put some red, orange and yellow watercolor paints on it – but that wasn’t bright enough so I got out my Magicals (gosh I love them!). Just look at the lovely colors I got with them! None of the colors I used had any mica in them and I really wanted that shimmer so after the Magicals were dry, I sprayed some Tattered Angels clear mica spray. I was very pleased with the result.

I die cut some dragonfies from Stampin Up as well as a “Hello!” die from my stash – I’m sorry I don’t know who made it. I mounted them to my Magicals layer that I then glued to a red layer and then used dimensionals to add them to a Peekaboo Peach card.

I took a couple of close ups to try to show the mica shimmer – its so pretty.

The inside has some butterflies and a lovely sentiment “Thanks for the smile and everything else” – how perfect is that? I also stamped the small butterflies on the envelope in the same Peekaboo Peach to tie it all together.

I hope you like my project today. It was a pretty simple card for a very special friend. I hope she likes it and that it makes her smile too! Thank you for spending a few moments with me today. Please leave me a comment if you have any questions or comments about today’s products or procedures. I would also love it if you leave me a comment and just let me know what you are working on lately – share the love – share the joy of crafting!

Til next time (I hope it won’t be too long), happy crafting everyone!

Jeanette

Day 42 of #100dayproject

Today I made a classy Christmas card (gold just makes anything more classy and elegant doesn’t it?)  I promised yesterday to use something from the current Stampin Up catalogue and the word dies that I used were premiered last year but they carried over and are still in the 2019 catalogue.

I used a Cherry Cobbler card base and some plaid paper.  The gold shimmer Happy Holidays pops off the card.  I cut the Happy Holidays once out of Cherry Cobbler, then again with the Gold Shimmer paper and layered them together.  I like making two or three (or more) layers of my word dies – it makes them more substantial and they stand out more when lifted a little. Sometimes you can offset the layers for a shadow effect which is also very nice.   I added my words to a Cherry Cobbler stitched shape which was then lifted with dimensionals and added to the card over a piece of Cherry Cobbler ribbon.  A simple, but I think, very effective card.  A great card to send to a gentleman on your Christmas card list!

I stamped the envelope with a 3 layer holly sprig.  Then I stepped it up a notch by lining the envelope with the same plaid paper from the card front.  A lined envelope always increases the impact of a card – a card is always considered more elegant and “rich” with a lining.

final-130

I lined the inside of the card with a piece of whisper white paper.  I heat embossed my sentiment with gold embossing powder to match the front and I repeated the holly sprig from the envelope.

final-129

A word of caution……….always confirm the orientation of your card when stamping the inside…….oops!

final-131

At least I caught my mistake before adhering it to my card.  Disaster averted.

I hope you are enjoying my jump on Christmas cards and that perhaps I have inspired to you get started too.  I promise is will make you feel fabulous and on top of the world, that you are so on top of things that you are starting your Christmas cards in May!!  I mean – who does that?  I did have a Facebook follower comment yesterday that she tries to do 5-6 Christmas cards every month — by November thats enough cards for MY list – how about yours?

Thanks for spending a few moments with me today – I really enjoy your company.  Leave me a comment if you have any questions about todays’ products or procedures.  And don’t forget to follow me on WordPress or via e-mail so you don’t miss a thing.

Til next time, happy crafting everyone,

Jeanette

Day 41 of #100dayproject

As promised yesterday, I made another tunnel card to show the versatility of this type of card. The only requirement is that the image you put in the tunnel has to be symmetrical so you can glue 3 images together to make the dimension.  The bad news is I picked another discontinued stamp set. But, as I proved today, you can pick any stamp set or theme that you want.

Here is what I came up with today.

The hard part about one of these cards is trying to photograph it!  You can’t lay it flat as you don’t get the tunnel affect – besides which, it does not want to lay flat! So you stand it up and you get shadows = uggghhh.

I heat embossed the sleigh, greeting, sentiment inside and the bow on the top of the tree – oh and the snowflakes on the envelope.  You just HAVE to put something on your envelopes – it makes the recipient smile from the moment they receive the card.  I also think it makes them feel a bit more special that someone has taken the time to decorate the envelope.  And a bonus is that if you mail it, the postal workers get to enjoy it too. lol  Just remember you have to leave the postmark and address areas clear.  And if you add embellishments (instead of just stamping), they need to be flat and glued down well – I recommend a Xyron machine.  Here are a few cards I made a few months ago for a special order with paper decoration on the envelopes.  All have been applied with full coverage, strong glue from a Xyron machine (I got mine on HSN but they are available everywhere (in the US at least) in all different sizes.  I like the little 1″ manual one for small pieces.)

Back to today’s card,  for the inside I went with white on white look.  I die cut some snowflakes (also discontinued – sorry – but you can use ANY snowflakes and I’m sure you have some.  Don’t forget to  “use what you have”.) in Whisper White and glued them down so it kind of gives an embossed look.  I think it is very classy looking.  Then I carried the gold from the front and heat embossed the sentiment.

I hope you like my project today and thank you for spending some of your day with me.  Leave me a comment if you have any questions about products or procedures used today.  And if you haven’t already done so, follow me on WordPress or sign up for e-mail notification so you don’t miss a thing.

I am really enjoying working on Christmas cards, so tomorrow I will pick something from the new Stampin Up catalogue that goes live on June 1st.  It may be a little difficult as they only have two 2-page spreads of Christmas in the annual catalogue!  Don’t fret though, the Holiday catalogue will be jam packed will all kinds of new sets – I can’t wait!   Let me know if you need a demonstrator, I know a few.

Get a head start on your Christmas cards and share them with me – I would love to see them.  It’s really a great feeling to get started so early (rather than frantically making them at the last minute to get them in the mail on time).

Til next time, happy crafting everyone,

Jeanette

Day 40 of #100dayproject

Today’s project is a Christmas card! As far as I’m concerned, it’s never too early to start your Christmas cards. I CASE’d (copy and share everything) my card from The Craft Spa, with a few minor changes.  She has a wonderful tutorial for the card (though I had a little difficulty converting centimeters to inches LOL).  Anyway, click on the link above to see her card and details on the card.

My card features the Star of Light stamp set and matching dies from Stampin Up. Unfortunately, this set has been discontinued but you may be able to get it on EBay. The design is an interesting tunnel design with the prettiest 3D star behind the tunnel cut out.  If you don’t have Star of Light, I am sure there are many other stamp sets that work well with this design.  Now that gives me an idea for tomorrow’s project – I will pick another stamp set and recreate this base card so you can see how well the design translates.

final-121final-122

I feel great that I have a start of this year’s Christmas cards!  I am inspired to do more.  Christmas is my favorite time of year.  My parents live with me so between Mom and I, we have a total of about 80 years of Christmases to collect decorations.  I collect snowmen and have over 150!  My mother collects Santa’s and nutcrackers and has quite a few of both.  Our Christmas tree is a 14 foot beauty filled with many special, antique ornaments.  My brother-in-law says it looks like Christmas threw up in our house! lol  I’ll share pictures this year.

Thank you for stopping by and spending a few minutes with me.  Share my post with someone else who may enjoy it.  Please leave me a comment if you have any questions about supplies or procedures used today – and share your creation if I inspired you today – I would love to see what you create.  Come back soon for more projects made with paper, beads, yarn and more!  Follow me on WordPress or sign up for e-mail notification so you don’t miss anything.

Til next time, happy crafting to you all,

Jeanette

Days 38 & 39 of #100dayproject

As I said in my last post, I am dog sitting for a dear friend.  She is another crafter friend and has a craft room with just about everything you could imagine in it (aaahhh – Heaven!).  I have spent the last two days on a “one page wonder” project.  If you don’t know what that is, you strategically cut apart a piece of patterned paper (in my case a 12″ x 12″ piece) to get the most out of it.  You can find cutting patterns all over Pinterest – just search “one page wonder”, or you can cut it your own way.

I was able to get 16 cards – yes, I said 16 cards out of one sheet of Stampin Up’s “Botanical Butterflies”.  It is a beautiful paper pack and the page I chose is my favorite.   I did punch butterflies from a different sheet for my embellishments.  I am not sure if that is cheating (to use extra) but I think the goal is to get as much as you can out of one piece.

And here are close-ups of each card:

You need to offset the negative space on some cards. On some above, I did some random stamping in the background. On these cards I used embossing folders for the background:

final-105

This card is one of my favorites – and it was actually an “extra”.  I didn’t like the size of one of my pieces when I was designing one of the above cards so I cut a strip off of the side and therefore had this piece leftover.  I knew the backgroud had to be impressive to offset such a small strip of paper so I randomly stamped butterflies on the black layer with VersaMark and heat embossed with white embossing powder.  I also heat embossed the sentiment.  Its really very pretty in person.

And I had this leftover – a 3″ piece only 3/8″ wide! I wouldn’t have had that left over but I decided to cut a rectangle into 3 strips for 3 long rectangle panels (the 6th card from the top), and to make the rectangles fit the width of the card, I had this lone little piece leftover.

I don’t care about using current product for my pieces.  I keep what I like and I use what I like, new or old.   Part of my goal with the #100dayproject is to “use what I have” and in this case, I helped my crafty friend get rid of some of her old discontinued product.

All of the products I used may not still be available but these cards are so universal, you can substitute any greetings or embossing folders or even coordinating colors (or any patterned paper for that matter).  I used some old discontinued Stampin Up ribbons in discontinued colors that coordinated perfectly with this patterned paper even though they were not listed as coordinating colors on the package.  So you can use the new current colors for 2019 or use up some old stuff.

I hope you enjoyed my cards and that I inspired you to try your own “one sheet wonder”.  If I did, I would love to see what you create.  If you liked my project, give me a like or share this with a friend who might like it.  Please let me know if you have any questions about products or procedures I used today.  Thanks for spending some time with me today and I hope to see you again soon.  If you haven’t already done so, follow me on WordPress or sign up for email notification.

Til next time, happy crafting,

Jeanette