Days 44-46 of #100dayproject – July 4th Sampler

Hello everyone! Firstly I want to apologize for my absence. I have been struggling with my chronic migraines for the last 5 weeks or so. My normal daily pain is usually a 1-3 on a pain scale of 10 with frequent spikes, but recently I have been stuck in a pain cycle with daily pain of 5-6. This level of pain makes it very hard to feel creative, and fighting this level consistently for 5 weeks is very exhausting, frustrating and depressing – which also leads to lack of creativity. My neurologist has put me on a 12 day course of steroids to try and break the cycle of pain – fingers crossed!

Ok, enough of that nonsense. In between pain and dog sitting at non crafty homes, I have been working on two projects. I can’t work long enough to complete anything in a day but I am plugging along. One project is a wedding travelers notebook for my soon to be step niece. It’s almost done and I hope to post it soon. The other project is a July 4th sampler for my mother. If you follow me you remember my Mothers Day sampler. Click here if you haven’t seen it and want to check it out. Well, I told you Mom was practical and would probably want to use the frame for other celebrations too – sure enough, she asked for a July 4th sampler.

I had fun creating this while cat sitting for my lovely friend Fern (who, by the way has the cleanest and most organized craft room ever! It puts mine to shame for sure!). She had a few pieces of loose sheets of patriotic paper that were perfect. Then I used real red and night of navy cardstock from Stampin Up as accents.

The only thing I knew I wanted was to cut out the July 4 letters with the large letters dies from Stampin Up. I cut them from the patriotic paper and from night of navy – then I glued them together offset for a shadow affect. I added some candles to the top of that panel because, after all, it is the birthday of our independence and what’s a birthday without candles?

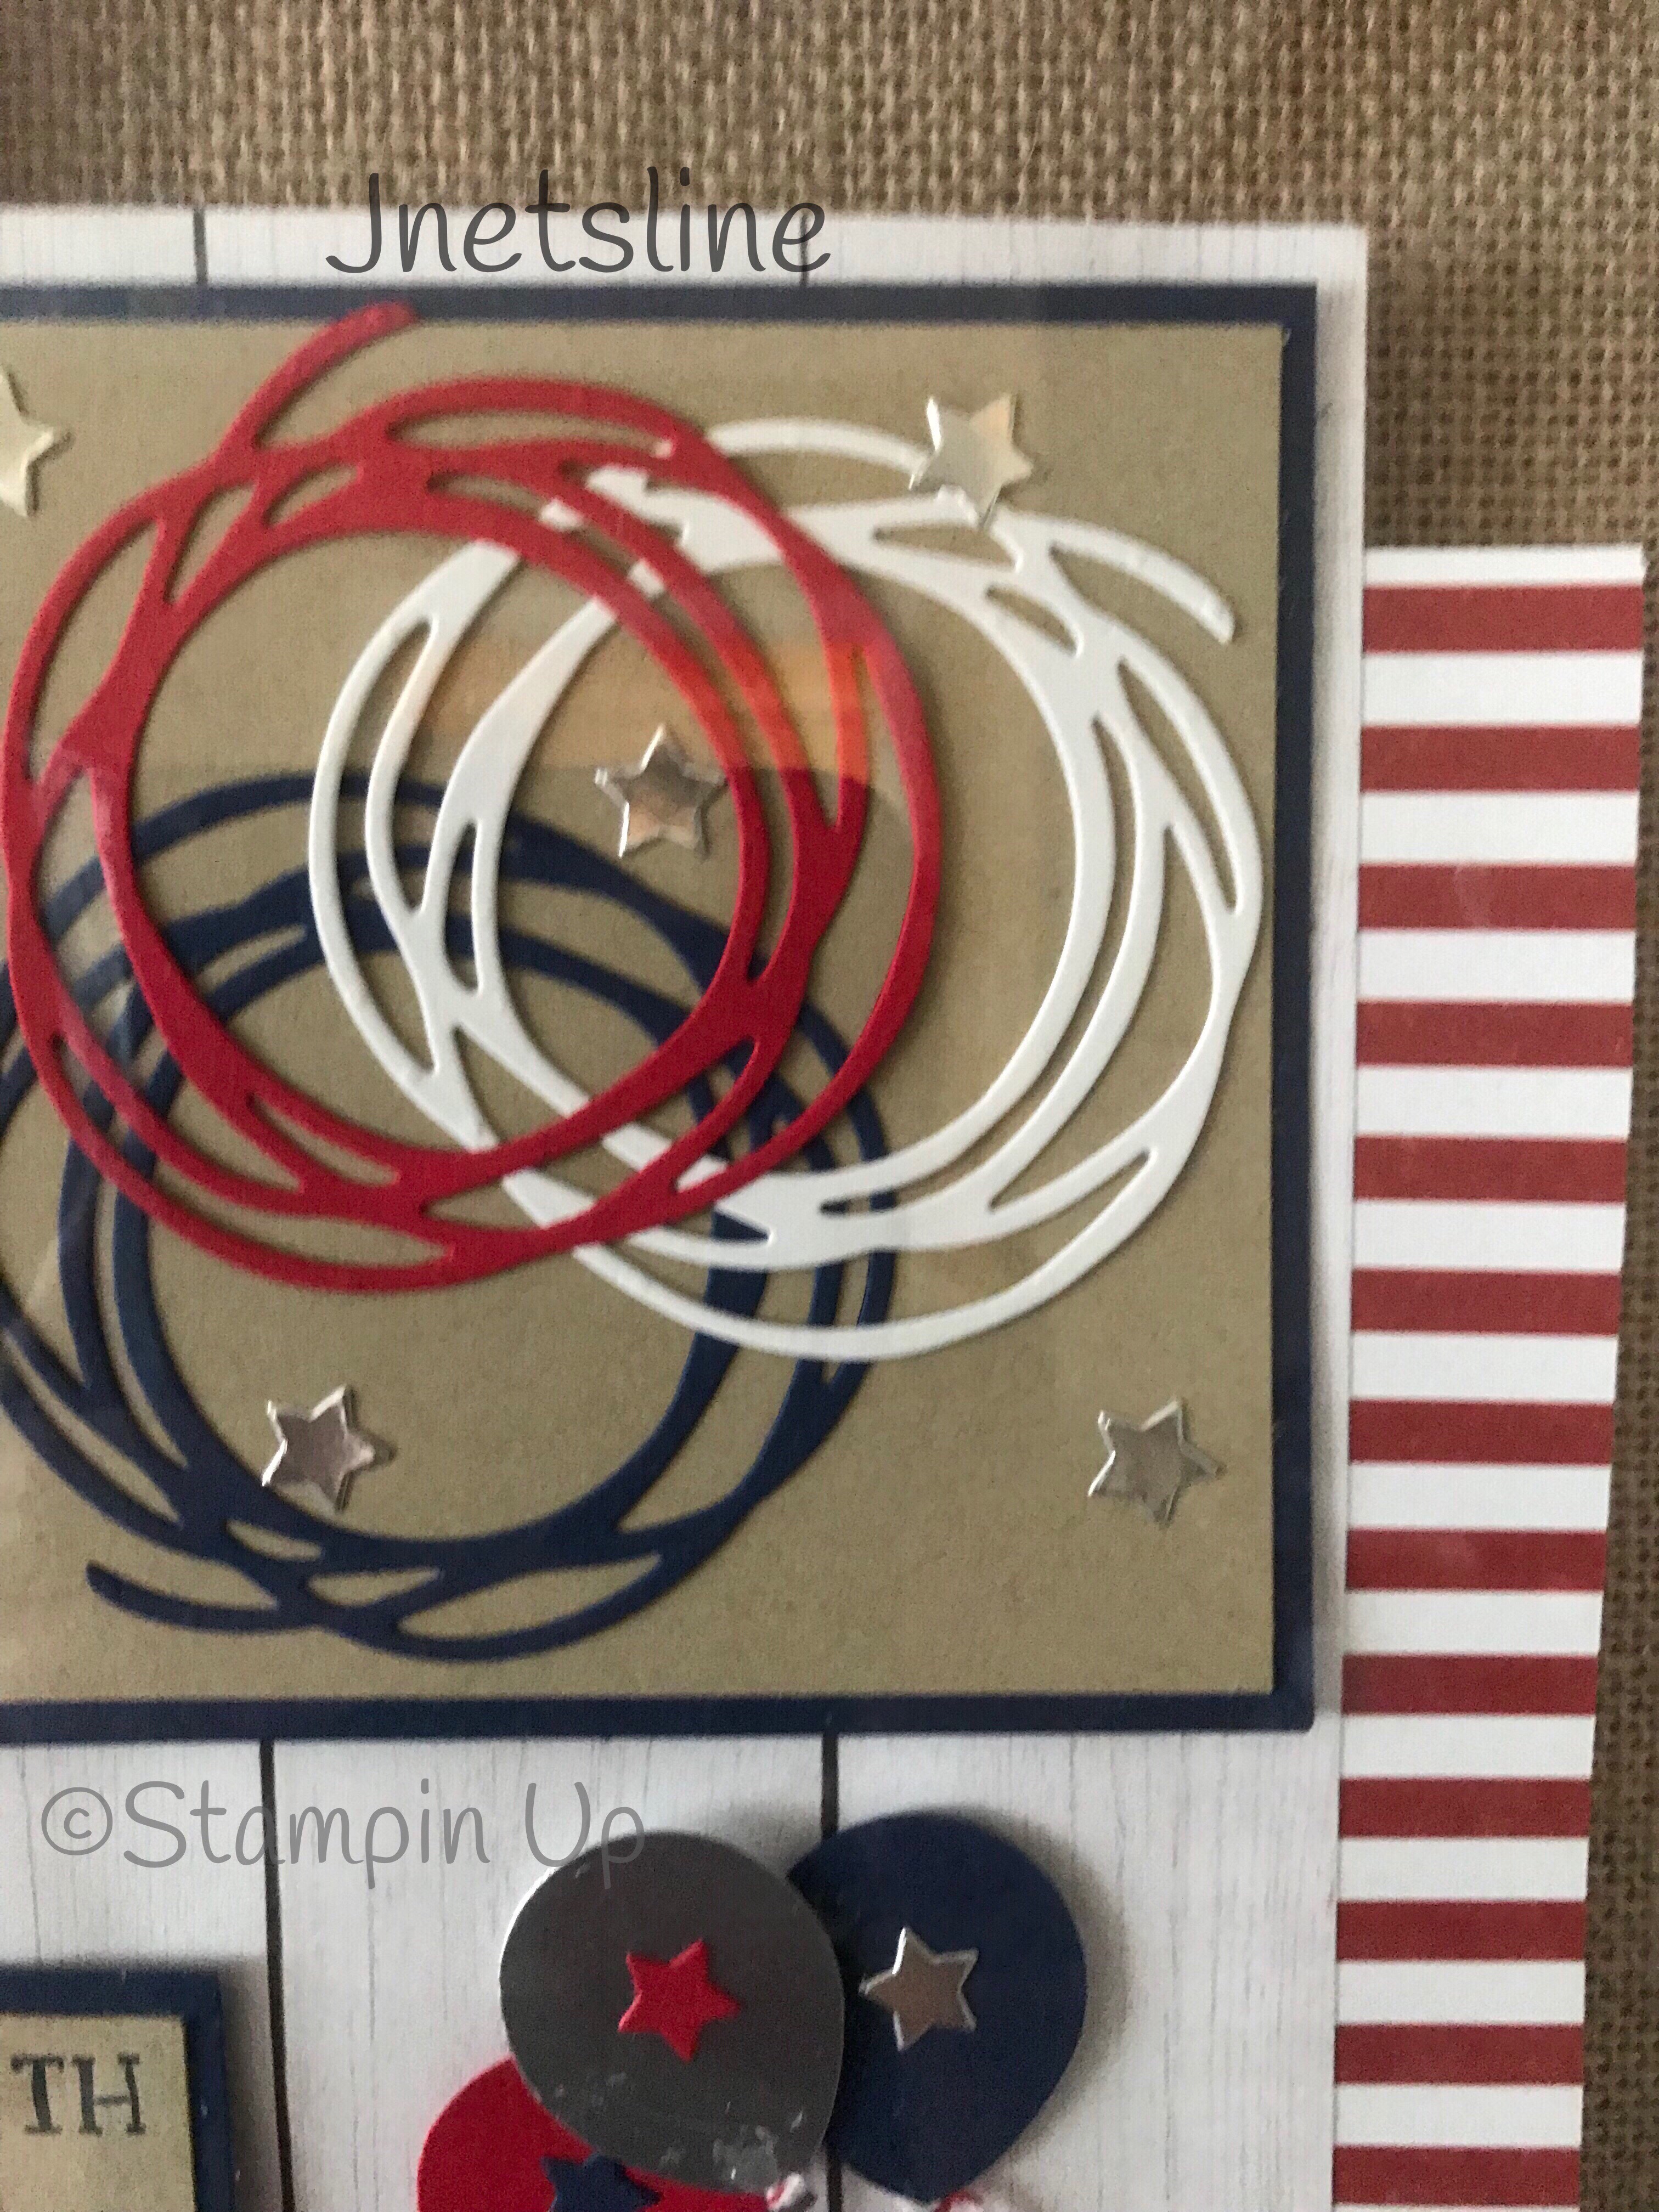
Then I looked through Ferns Stampin Up stamps and dies for things I could use to symbolize Independence Day. I wanted to make a sparkler using the starburst swirl from the Star of Light set that I used in the background of this card. I thought it would be perfect in embossed silver as the trail of sparkles from the sparkler. Unfortunately I could not find any silver embossing powder. 😕

https://jnetsline.wordpress.com/2019/05/28/day-40-of-100dayproject/

So I turned to the Swirly Scribbles dies. I used the wavy one to make the flag. I love how it looks like the flag is blowing in the wind. I punched a few stars and helped them pop with some white gel pen around the edges. I used the round swirl dies to symbolize fireworks. I added a few silver stars to further the affect.


The word “Celebrate” was a perfect choice of course. And then I saw the T-shirt builder set! Who doesn’t have a patriotic shirt to wear for the holiday?

The ballon punch was an obvious choice. I added stars and some bakers twine for a great look. The Call Me Cupcake framelits made a great patriotic sweet treat.

Lastly, I had to wait til I got home because I had the perfect supplies to make rockets to finish off my sampler!! I used red & white paper straws for the body and I had gotten a box of decorative toothpicks at a yard sale (you know, the kind you put in sandwiches or maybe fruit or cheese). I had red, blue and gold but I went with the red for “The rockets red glare”. Then I punched some circles, cut out a wedge and used a ball stylus on a foam pad to start the curl and glued them into a cone shape. I glued them together with tacky glue and got fabulous rockets!! I am so pleased with how they came out.

My favorite part of the project was giving it to my mom! She was so pleased and excited she was almost dancing. I loved the smile on her face. That is why I like crafting and creating – I love to make people happy, or feel good, or cared about. Mom was so excited, we had to move the frame. We had hung it in the entryway at the front door so guests would see it, now she wanted it where WE could see it all the time! Now it has an honored place in the dining room.  Not sure yet what I will create for the next sampler for our shadow box frame – any suggestions?  I know I have to create a Halloween one and a Christmas one but there must be something I should do before then………  I really would appreciate any suggestions.

I hope you like my project today, and if you did please give it a like and share it with someone else who might enjoy it. Maybe I inspired you to create your own sampler – if I did, I would love to see what you create – share it on my Facebook page. Please leave me a comment if you have any questions about my project or if you need a referral to a Stampin Up demonstrator.

Thank you for stopping by today and sharing a few moments with me. If you haven’t already done so, don’t forget to click the follow button or sign up for e-mail notification so you don’t miss any of my projects. A special thank you to Fern for allowing me to use her scrap room and supplies to create this great sampler. Fern, I can’t wait to sit for your cats again!

Til next time, happy crafting everyone!

Jeanette

Days 38 & 39 of #100dayproject

As I said in my last post, I am dog sitting for a dear friend.  She is another crafter friend and has a craft room with just about everything you could imagine in it (aaahhh – Heaven!).  I have spent the last two days on a “one page wonder” project.  If you don’t know what that is, you strategically cut apart a piece of patterned paper (in my case a 12″ x 12″ piece) to get the most out of it.  You can find cutting patterns all over Pinterest – just search “one page wonder”, or you can cut it your own way.

I was able to get 16 cards – yes, I said 16 cards out of one sheet of Stampin Up’s “Botanical Butterflies”.  It is a beautiful paper pack and the page I chose is my favorite.   I did punch butterflies from a different sheet for my embellishments.  I am not sure if that is cheating (to use extra) but I think the goal is to get as much as you can out of one piece.

And here are close-ups of each card:

You need to offset the negative space on some cards. On some above, I did some random stamping in the background. On these cards I used embossing folders for the background:

final-105

This card is one of my favorites – and it was actually an “extra”.  I didn’t like the size of one of my pieces when I was designing one of the above cards so I cut a strip off of the side and therefore had this piece leftover.  I knew the backgroud had to be impressive to offset such a small strip of paper so I randomly stamped butterflies on the black layer with VersaMark and heat embossed with white embossing powder.  I also heat embossed the sentiment.  Its really very pretty in person.

And I had this leftover – a 3″ piece only 3/8″ wide! I wouldn’t have had that left over but I decided to cut a rectangle into 3 strips for 3 long rectangle panels (the 6th card from the top), and to make the rectangles fit the width of the card, I had this lone little piece leftover.

I don’t care about using current product for my pieces.  I keep what I like and I use what I like, new or old.   Part of my goal with the #100dayproject is to “use what I have” and in this case, I helped my crafty friend get rid of some of her old discontinued product.

All of the products I used may not still be available but these cards are so universal, you can substitute any greetings or embossing folders or even coordinating colors (or any patterned paper for that matter).  I used some old discontinued Stampin Up ribbons in discontinued colors that coordinated perfectly with this patterned paper even though they were not listed as coordinating colors on the package.  So you can use the new current colors for 2019 or use up some old stuff.

I hope you enjoyed my cards and that I inspired you to try your own “one sheet wonder”.  If I did, I would love to see what you create.  If you liked my project, give me a like or share this with a friend who might like it.  Please let me know if you have any questions about products or procedures I used today.  Thanks for spending some time with me today and I hope to see you again soon.  If you haven’t already done so, follow me on WordPress or sign up for email notification.

Til next time, happy crafting,

Jeanette

Days 34, 35, 36 and 37 of#100dayproject

I’m sorry, I am behind in my postings.  I promise I have been working, just haven’t gotten a chance to post.  I am currently sitting for a very special friend who has 3 dogs and 2 cats for me to care for – one of which is a 1 month old abandoned puppy.  She is the sweetest thing and still has a bottle most of the time (she gets a couple meals of cereal and mashed up puppy food).  Check out my post on Instagram for some cute photos.

Back to crafting, before I left home I spent four days working on a 7″ x 7″ interactive album.  It’s still not finished, I need to decorate the front, decide on a closure and add some more tuck spots.  This is the paper I used:

I looooooooove this paper!  In case you didn’t know, I am a purple girl all the way.  I have had this pad for a while and I don’t think it is available any longer.  However, you can still get Prima’s “Lavender Frost” which is also gorgeous.  I also had a daily planner kit I got on Blitsy with embellishments that coordinated so I used a few pieces from that.  I used 110 lb white card stock I purchased at Michaels.  I am very new to mini albums as this is only my second one.  In hindsight, I should have used 110 lb for the base page and then 65 lb for all the flips and fold outs etc.  It ended up a bit bulky with all 110 lb but it is still great.

Here is what I have so far:

final(126)

I had a role of embossed wallpaper border that I used to cover the spine – it was the perfect width.  All I had to do was paint it to match, then I rubbed some antique gold (that I just noticed does not show at all in my photo??!??!) over the embossing to coordinate with the corner covers and embellishments I plan to use on the front.  Here is a closeup of the spine:

final(125)

The album has four pages and many many flaps and fold outs on every page including the inside front and back covers.  Here are a few of the pages (I’ll post everything when it is done):

final(124)final(123)final(122)

All of the foldouts and flaps have hidden magnet closures.  I distressed all of the edges of the patterned paper for an aged look.  This album can hold a total of 65 photos.  I also made 33 photo mats for various sized photos that can be used – or photos can be attached directly to the pages. (I’m sorry the coloring is way off in this photo – I took all of these pictures at the same time, I don’t know why this one came out with this tone?  I retook it 4 times and it kept doing it.  The colors are a soft lavender that matches the paper perfectly and the border is the same as the wallpaper spine). I think I am going to have to start using a real camera instead of my phone,

final(121)

Again, I’ll post the final result when I get to finish it.  I have dogsitting assignments for the next three weeks so I won’t be home for a while to work on it.  It will be available in my Etsy store when it is completed.

Thank you so much for spending a few moments with me today.  Let me know what you think of my project so far.  Don’t forget to give me a like if you like it, and share with your friends if you know someone else who would enjoy.

Til next time, happy crafting,

Jeanette

Day 24 of #100dayproject

Today’s project is very simple wedding card featuring a sweet pair of birds from from the new Stampin Up designer series paper “Bird Ballad”.  I used a Granny Apple Green standard A2 card base.  Granny Apple Green was not one of the listed coordinating colors for the paper but I love it.  I cut a 2 1/2″ wide piece of the patterned paper and ran lace trim along both sides.  I stamped a wedding greeting and used an oval punch – I backed it with a scallop oval punch and attached it with dimensionals.  I used a Wink of Stella pen on the pair of birds to make them stand out.

The green paper was light enough to stamp on but since it is a wedding card, I felt a liner was warranted.  I added a very nice wedding sentiment and a leaf stamp with first and second generation stamping in two corners.

The envelope has the same leaf stamp.  It really makes an impact to have something on your envelope.

I took a short video so I could try to show you the glitter on the birds from the Wink of Stella pen.


Todays card was very simple. The patterned paper did all the work.  For tools, I used a paper trimmer and two punches for the sentiment.  This entire card could be made with only scissors and some adhesive.  Exact measurements are not even needed – eyeball it all – you only need to be sure it fits in your envelope. You don’t even need stamps, you could handwrite the sentiments and draw the leaf embellishments if needed, but any leaf stamp will work and you could make it for any occasion so use whatever sentiments you have.  (but if you do want the Stampin Up stamps I used or the patterned paper, I can hook you up with a great demonstrator if you need one! lol)

I hope you like my card today and that you got inspired to create your own.  If you were inspired, I would love to see what you make.  Thank you for stopping by and spending a moment or two with me.  Please let me know if you have any questions about todays project.  Don’t forget to like, comment or share.

Til next time, happy crafting…….

Jeanette


Day 17 of #100dayproject

I know I have been absent a few days but I was busy with Easter, then had to get ready to be away for 2 1/2 weeks dog sitting. For the next two weeks I am at the home of another Stampin Up friend so most of my projects will be with Stampin Up products. Please let me know if you want to order – I can hook you up with a demonstrator.

Today’s project is a lovely butterfly card for a special person in your life – the simple sentiment: “You matter – to me”.  I love it!  The dies are from a fabulous set of 20 different dies – including this one that is 5 butterflies all in one — with a matching overlay die.  I pieced back in the cut out pieces from the center butterfly to give it a little more dimension.

The interior of the card has the second part of the sentiment along with teeny tiny butterflies and a leaf flourish that are all part of the same set of dies.

And as always, I like to decorate the envelope so 3 more of the dies from the set adorn the envelope.

I hope you like today’s project that was relatively simple, just a little time consuming to find the right cut out pieces to inlay in that center butterfly.  Please let me know if you have any questions about products, colors or techniques used today.  Thanks so much for sticking with me on my 100 day journey even though it is taking me a bit longer than most.  If you have a moment, please give me a like, comment or share.  Thanks again and I hope to see you back again soon.

Til next time, happy crafting ……

Jeanette

Day 11 of #100dayproject

Ok, so I created two cards for today’s projects buuuuutttt………. I can’t post them because the recipients will see them before they receive them — and that’s no fun for them.

I wanted to document that I completed a day of my project but couldn’t figure out how to do that without spoiling the surprise for the recipients.  I decided I would just give you a teaser close up of the card fronts!  I know my recipients will still probably figure out it is for them – but at least the whole surprise is not ruined.

It was my last day in my borrowed craft room, so again, this is all Stampin Up products.  By the way, let me know if you would like to order and need a demonstrator – I have recommendations.

I will post full pictures after the cards are received, but if you can’t wait, send me a message and I’ll share with you now.

My froggy coloring does not look that great so close up but normal size its OK.

Even though you did not get a full project today, thanks for stopping by and come on back to see the full project in a week or so.  If you have a moment, please like, comment or share with your friends – it is much appreciated.

Till next time, happy crafting!

Jeanette

Day 10 of #100dayproject

I made two more cards today.  As promised yesterday, I made an Easter card for my nephew (since yesterdays was for my niece).  I LOVE the way it came out.  It was inspired by Vicky Papaioannou – I love her videos and she has done a number of cards with characters popping out windows.  She is a fabulous mixed media artist and card maker.  If you are not familiar with her, check out her blog, Clips-n-Cuts or her YouTube videos – you won’t be disappointed.

Back to my projec (all products today are from Stampin Up),  I used the Gingham Gala DSP  – in Balmy Blue this time.  I started with a Whisper White card base and added a 4 x 5 1/4″ layer of Balmy Blue.  Then I cut a rectangle of the gingham paper with the 3rd largest Stitched Rectangles die.  I then cut three windows with the 3 smallest Layering Circle dies.  I used those same 3 dies along with the next size up Scalloped Circle dies to make the window frames out of Balmy Blue.

The stamp sets were the same as yesterday, Fable Friends, Little Cuties and Basket Bunch.  I stamped the bunny, puppy (with the added bunny ears) and squirrel on Whisper White card stock and colored them with Watercolor Pencils, then fussy cut them all.  I put the gingham layer on Dimensionals and glued the characters in the windows as if they were leaning through the window.  It came out so super cute.  I need some glitter glue for the eyes and flower center but could not find any in my borrowed craft room so I will have to wait until I get home to add the sparkle.

Here is the card inside.  A very cute sentiment with a “chocolate” bunny.

My second card for today was inspired by my own cats and the cats I am sitting for this weekend.  The stamp set is Nine Lives and I stamped the cat and greeting on Whisper White card stock.  I also stamped the tiny tiny fish 3 times and the mouse once on Whisper white.  I cut the cat with the Cat Punch.  Then I did my fussy cutting and let me tell you those fish were verrrrrry tiny but I really wanted to put them in the food bowl so I persevered and got them cut out.  I stamped the food bowl on a piece of Wood Textures 6 x 6″ DSP.  I fussy cut that and cut a slit with an X-Acto knife so I could tuck the fish in so they would look like they were “in” the bowl not just “on” the bowl.  I used a piece of Blushing Bride DSP from the Bundle of Love set.  I wanted something to look like wallpaper and I think this really did the trick.  I cut the rug from the Gingham Gala DSP with a stitched rectangle.  I stamped the mouse in the corner so I could get his tail without having to cut it out (I fussy cut the body of the mouse and glued it over the stamped image).

I used the Layering Squares dies to cut my greeting, frame and mat layer so it would look like a picture on the wall.  The frame is cut from the Wood Textures DSP.  I love the affect.  I attached the frame and Cat with Dimensionals.

Here is a close-up of those tiny fish and the cute mouse.

Here is the card inside.

I hope you liked my projects for today.  I can’t wait to give my niece and nephew their Easter cards!  Please let me know if you have any questions about products or procedures – I would be happy to provide more information.  Thank you for stopping by today and I hope to see you back here again soon.  If you have a moment, I would love it if you could like, comment or share my post with a friend.

Til next time, happy crafting,

Jeanette

Day 8 of #100dayproject

Todays’ project was a set of greeting cards perfect for birthdays or any special day really.

img_1743

I had so much fun playing with the Lindy’s Stamp Gang Magicals yesterday that I had to play with them again today!  You can see some of the mica sparkle around the top of the close up below.  Again, I used watercolor paper but today, I stamped first with VersaMark  to obtain a resist affect.  It didn’t come out as good as I had hoped, I don’t know if my pad is a bit dry or if the Magicals penetrated the paper too much.  I think next time I’ll heat emboss with clear powder so it will show up more.  I still like how the background came out – just not exactly what I was looking for.  I then used Stampin Up’s Beautiful Peacock stamp set to create my top layer.  I used Old Olive and Night of Navy inks.  I cut the stamped image to 3 x 4″ and backed it on a piece of Night of Navy cut to 3 1/4 x 4 1/4″.  I added dimensionals behind the night of navy layer and put them on the Magicals layer.  I stamped the body of the peacock an extra time for each card so I could fussy cut them and add them on top with dimensionals.  I added some bling to the tail feathers and finished it off with an Old Olive bow.

I hope you enjoyed my project today.  Please comment below to let me know what you think. Are you participating in the #100dayproject?  Comment below and let me know what you are doing whether it is part of the project or not – pop in a link for your post – I would love to see what you are up to. Please feel free to ask me anything about products or procedures I used – I would be happy to provide whatever information I can.  Thank you for stopping by today and I hope to see you here again soon.  If you have time, I would appreciate if you could like, comment or share my post with a friend.

Till next time, happy crafting,

Jeanette