
I am sorry I missed my project yesterday my crafty friends – my head was bad again – woke me at 4:30 pounding! I hate starting my day with it bad. It finally eased up after dinner, thank goodness. It is not great today, but I am managing. I’m very disappointed I missed another day, putting me further behind in the project. I should be on 18 today – only 3 days behind so I guess that’s not too bad. I am disappointed but not discouraged. I will keep going and I will complete my 100 days, no matter how long it takes me.
I am dog sitting again for two lovely and verrrry large Huskies and one sweet little cat. Unfortunately, it is not for a crafty friend so I don’t have a craft room to borrow. As a result, I had to get creative with my projects for the weekend. I had to find things I could bring with me without too many supplies (or too much mess).
Today I decided to work with my new silicone molds and some Prima paper clay to make embellishments for future mixed media pieces. This was my first time and I am pleased with the results – I can’t wait to use them.
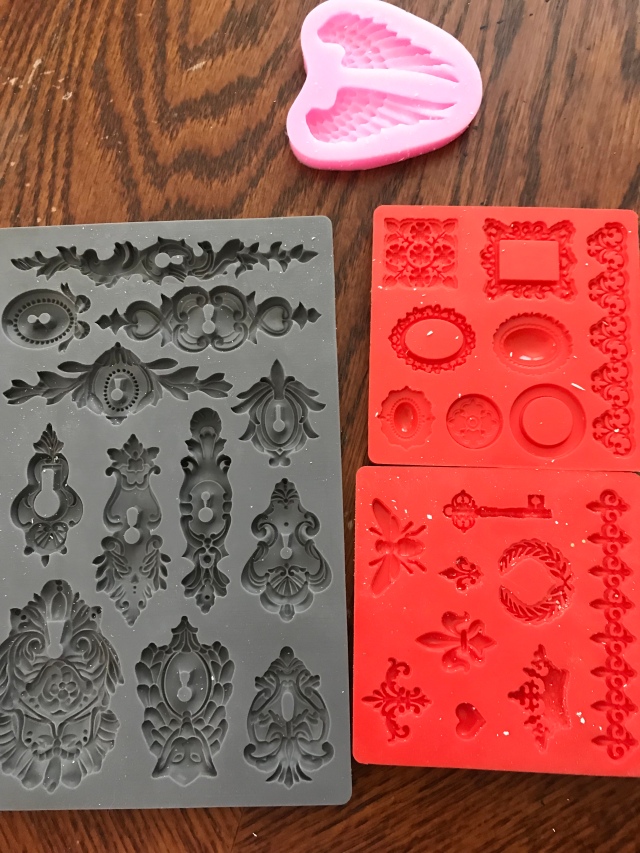
You need silicone molds to easily remove your paper clay pieces. I have a few molds from different places. The gray ones are from Prima and these are a stiffer silicone. The red one are from Mod Podge. They make (or made? I can’t find any on their website so maybe they don’t make them anymore – though you can find them on Amazon) opaque white or colored sticks for use in your glue gun (I’m sorry, I don’t know if they are glue or if they have some silicone in them – they dry hard). Anyway, the red molds are made for the glue sticks but they work fine with the paper clay. The pink one was a cheap one I ordered from China and it worked fine but it was much softer (jellier) which made it a bit harder to use with the paper clay – it took a lot more manipulating to get the cavity filled (but not overfilled).
As I said, the paper clay I used was from Prima and I found it very stiff and a bit dry. I have seen YouTube videos with a much softer clay which seems easier to manipulate. They say the softer the clay, the harder it is to remove your piece and recommend cornstarch or baby powder. I had no problem removing the drier clay – my problem was getting it to be smooth, the pieces did not want to blend together. I added a tiny bit of water (dipping one fingertip in at a time) and found that helped. They are not dry yet but you can see cracks in some of the pieces. I’m OK with that, for my purposes it will just make them look more aged and worn. They will accept paint easily, then I can stain or wax them to show detail. Here’s what I made today:

Here are some close-ups. You can see the “cracks” on the keyhole pieces where the clay just wouldn’t blend together. I love all of the detail you get with these molds and I can’t wait to use these pieces. My brain is already swirling thinking of projects. The process was not hard and the results are very cost effective. The paper clay is not expensive (and you can use your coupons at any of the craft stores). If I remember right, the cost of the molds was about the same as buying one package of pre-made embellishments – and now you can make as many pieces as you want and save a lot of money. Just take a day to make a whole slew of pieces, then you have them ready to go for many projects to come.


I hope you liked my project today. Thank you for stopping by today and I hope you come back soon to see how I use these pieces (I’ll be sure to point out when I use one). If you have time, I would appreciate a like, comment or share. Please let me know if you have any recommendations on clay or mold brands. Also, please don’t hesitate to ask me anything – I would be happy to chat with you. Thanks again for being with me today.
Til next time, happy crafting ….
Jeanette

