
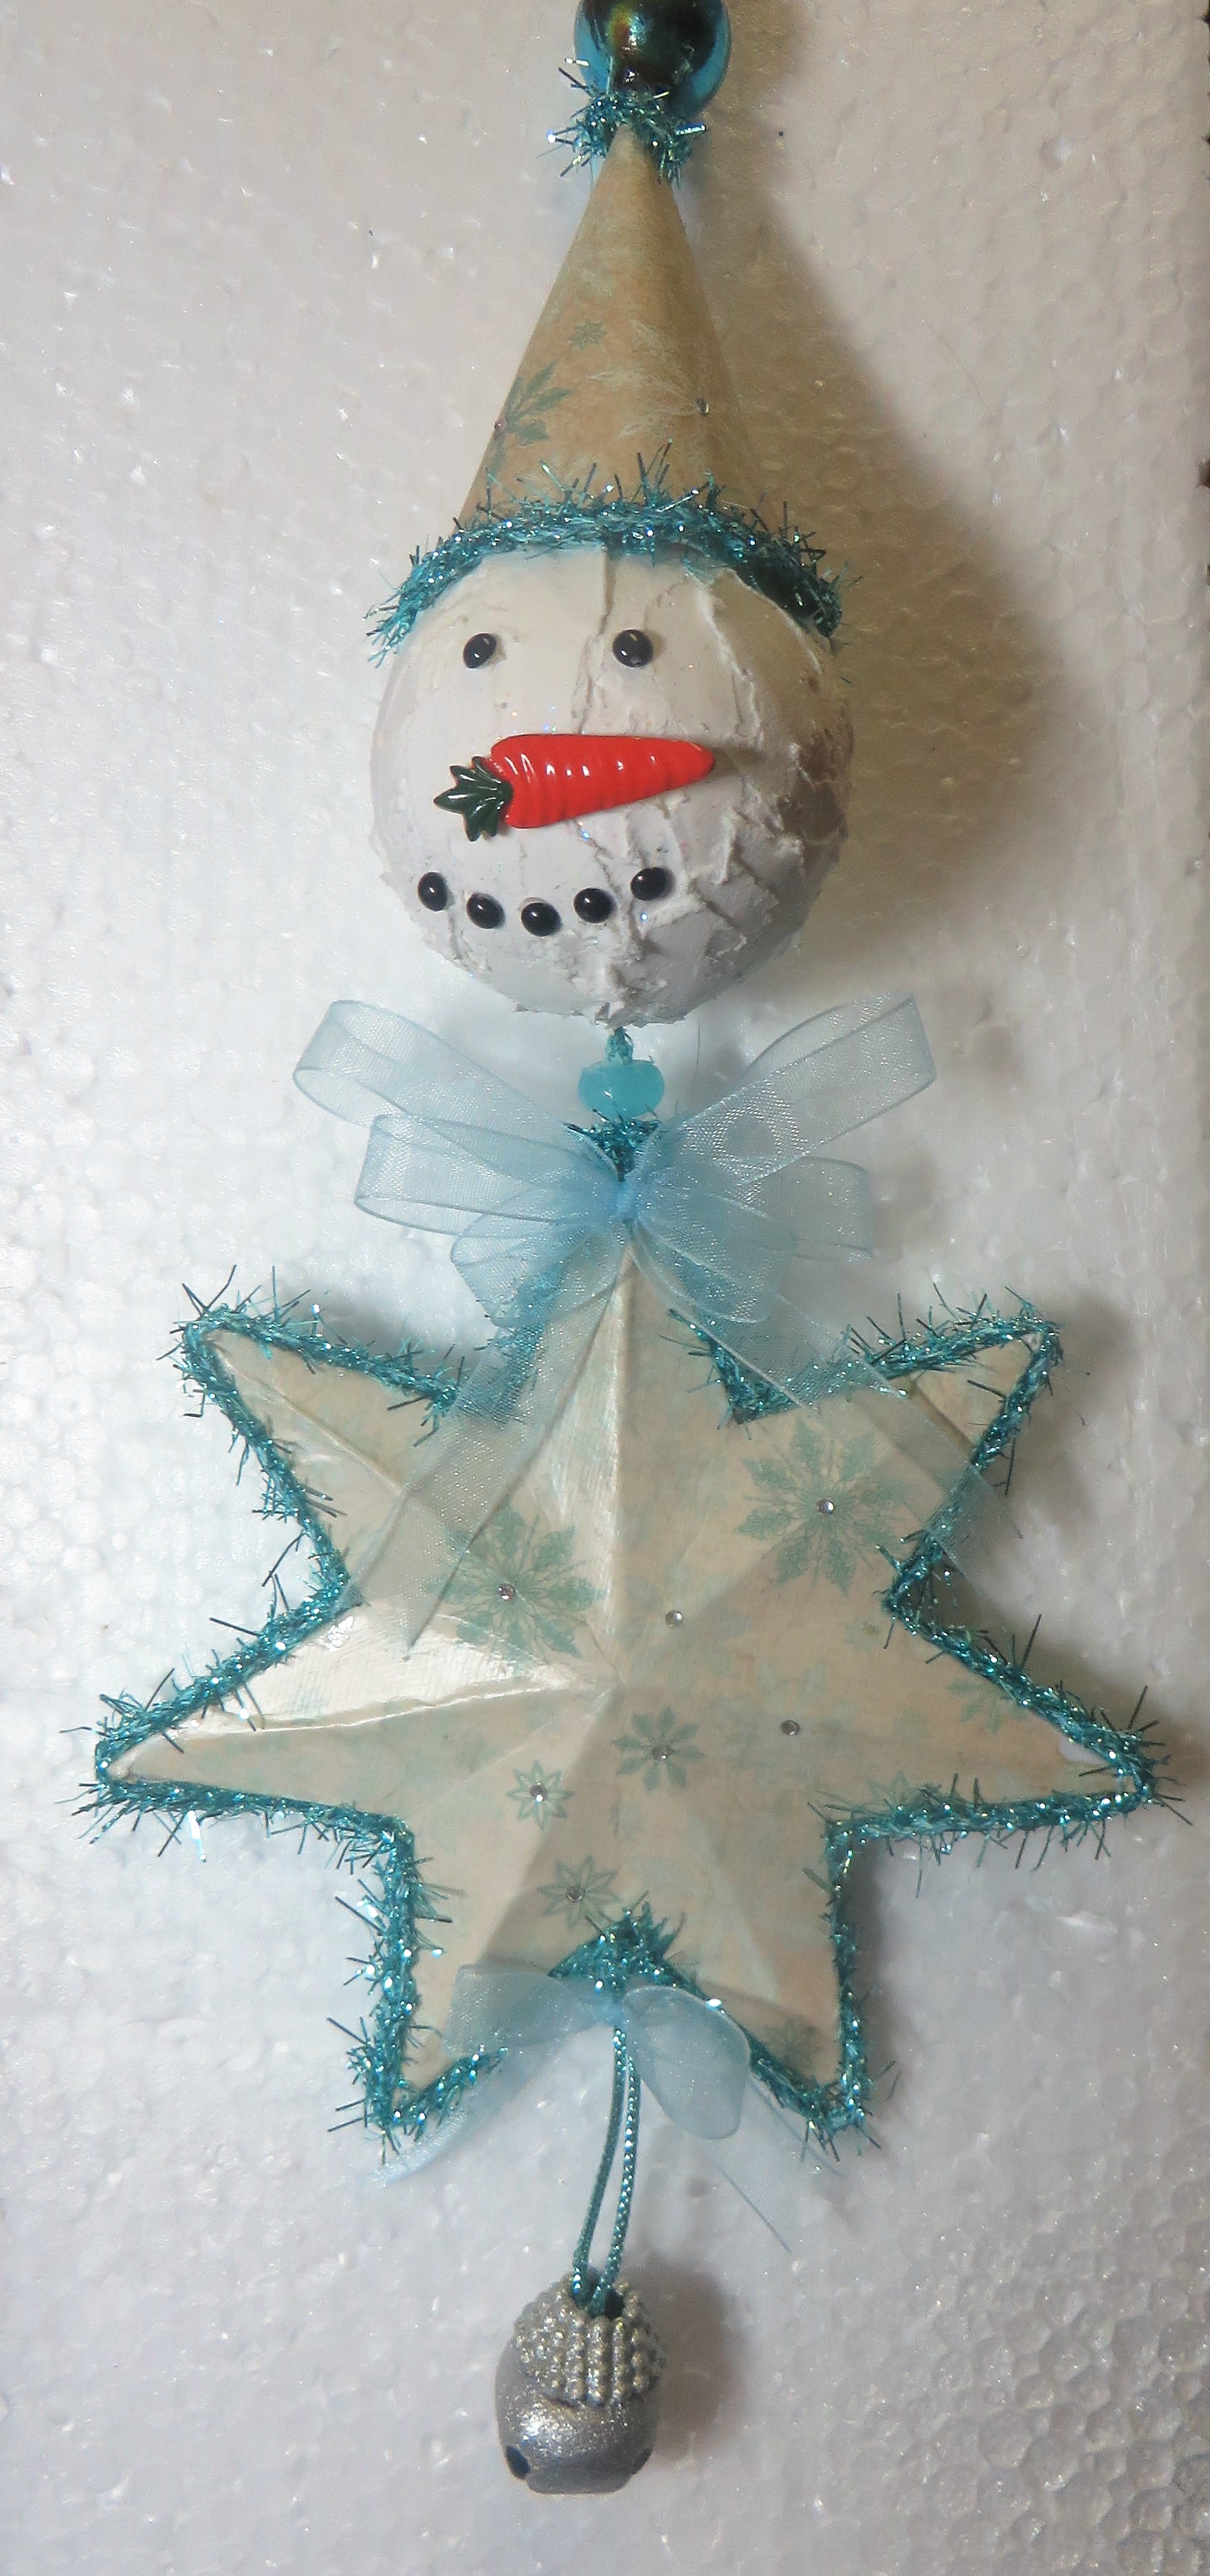
I think he is so adorable. I hope my partner, Shirley Wood likes him as much as I do when she receives it!
There were quite a few steps involved but in hind site, some things could have been done easier – now that I KNOW what the final outcome is. LOL I had a general picture in my mind but nothing to work from and I ended up making some things harder than necessary. Starting with the head, I took a 2 inch Styrofoam ball, mixed my own paper mache paste (1/2 cup water, 1 cup flour) — and now here was my first mistake but I am going to tell everything I did — instead of paper, I used 1/2 wide gauze to “paper mache” the head. I don’t know what I was thinking, but I did not like the look, it did not come out as smooth as I had hoped, so I then tried a few layers of gesso.

I still didn’t like it. So, then I took a jar of artificial snow (with a little glitter in it) and smeared it on with a palette knife.

THAT was much better, now it looks like it was rolled in the snow! (I saved the face for last)
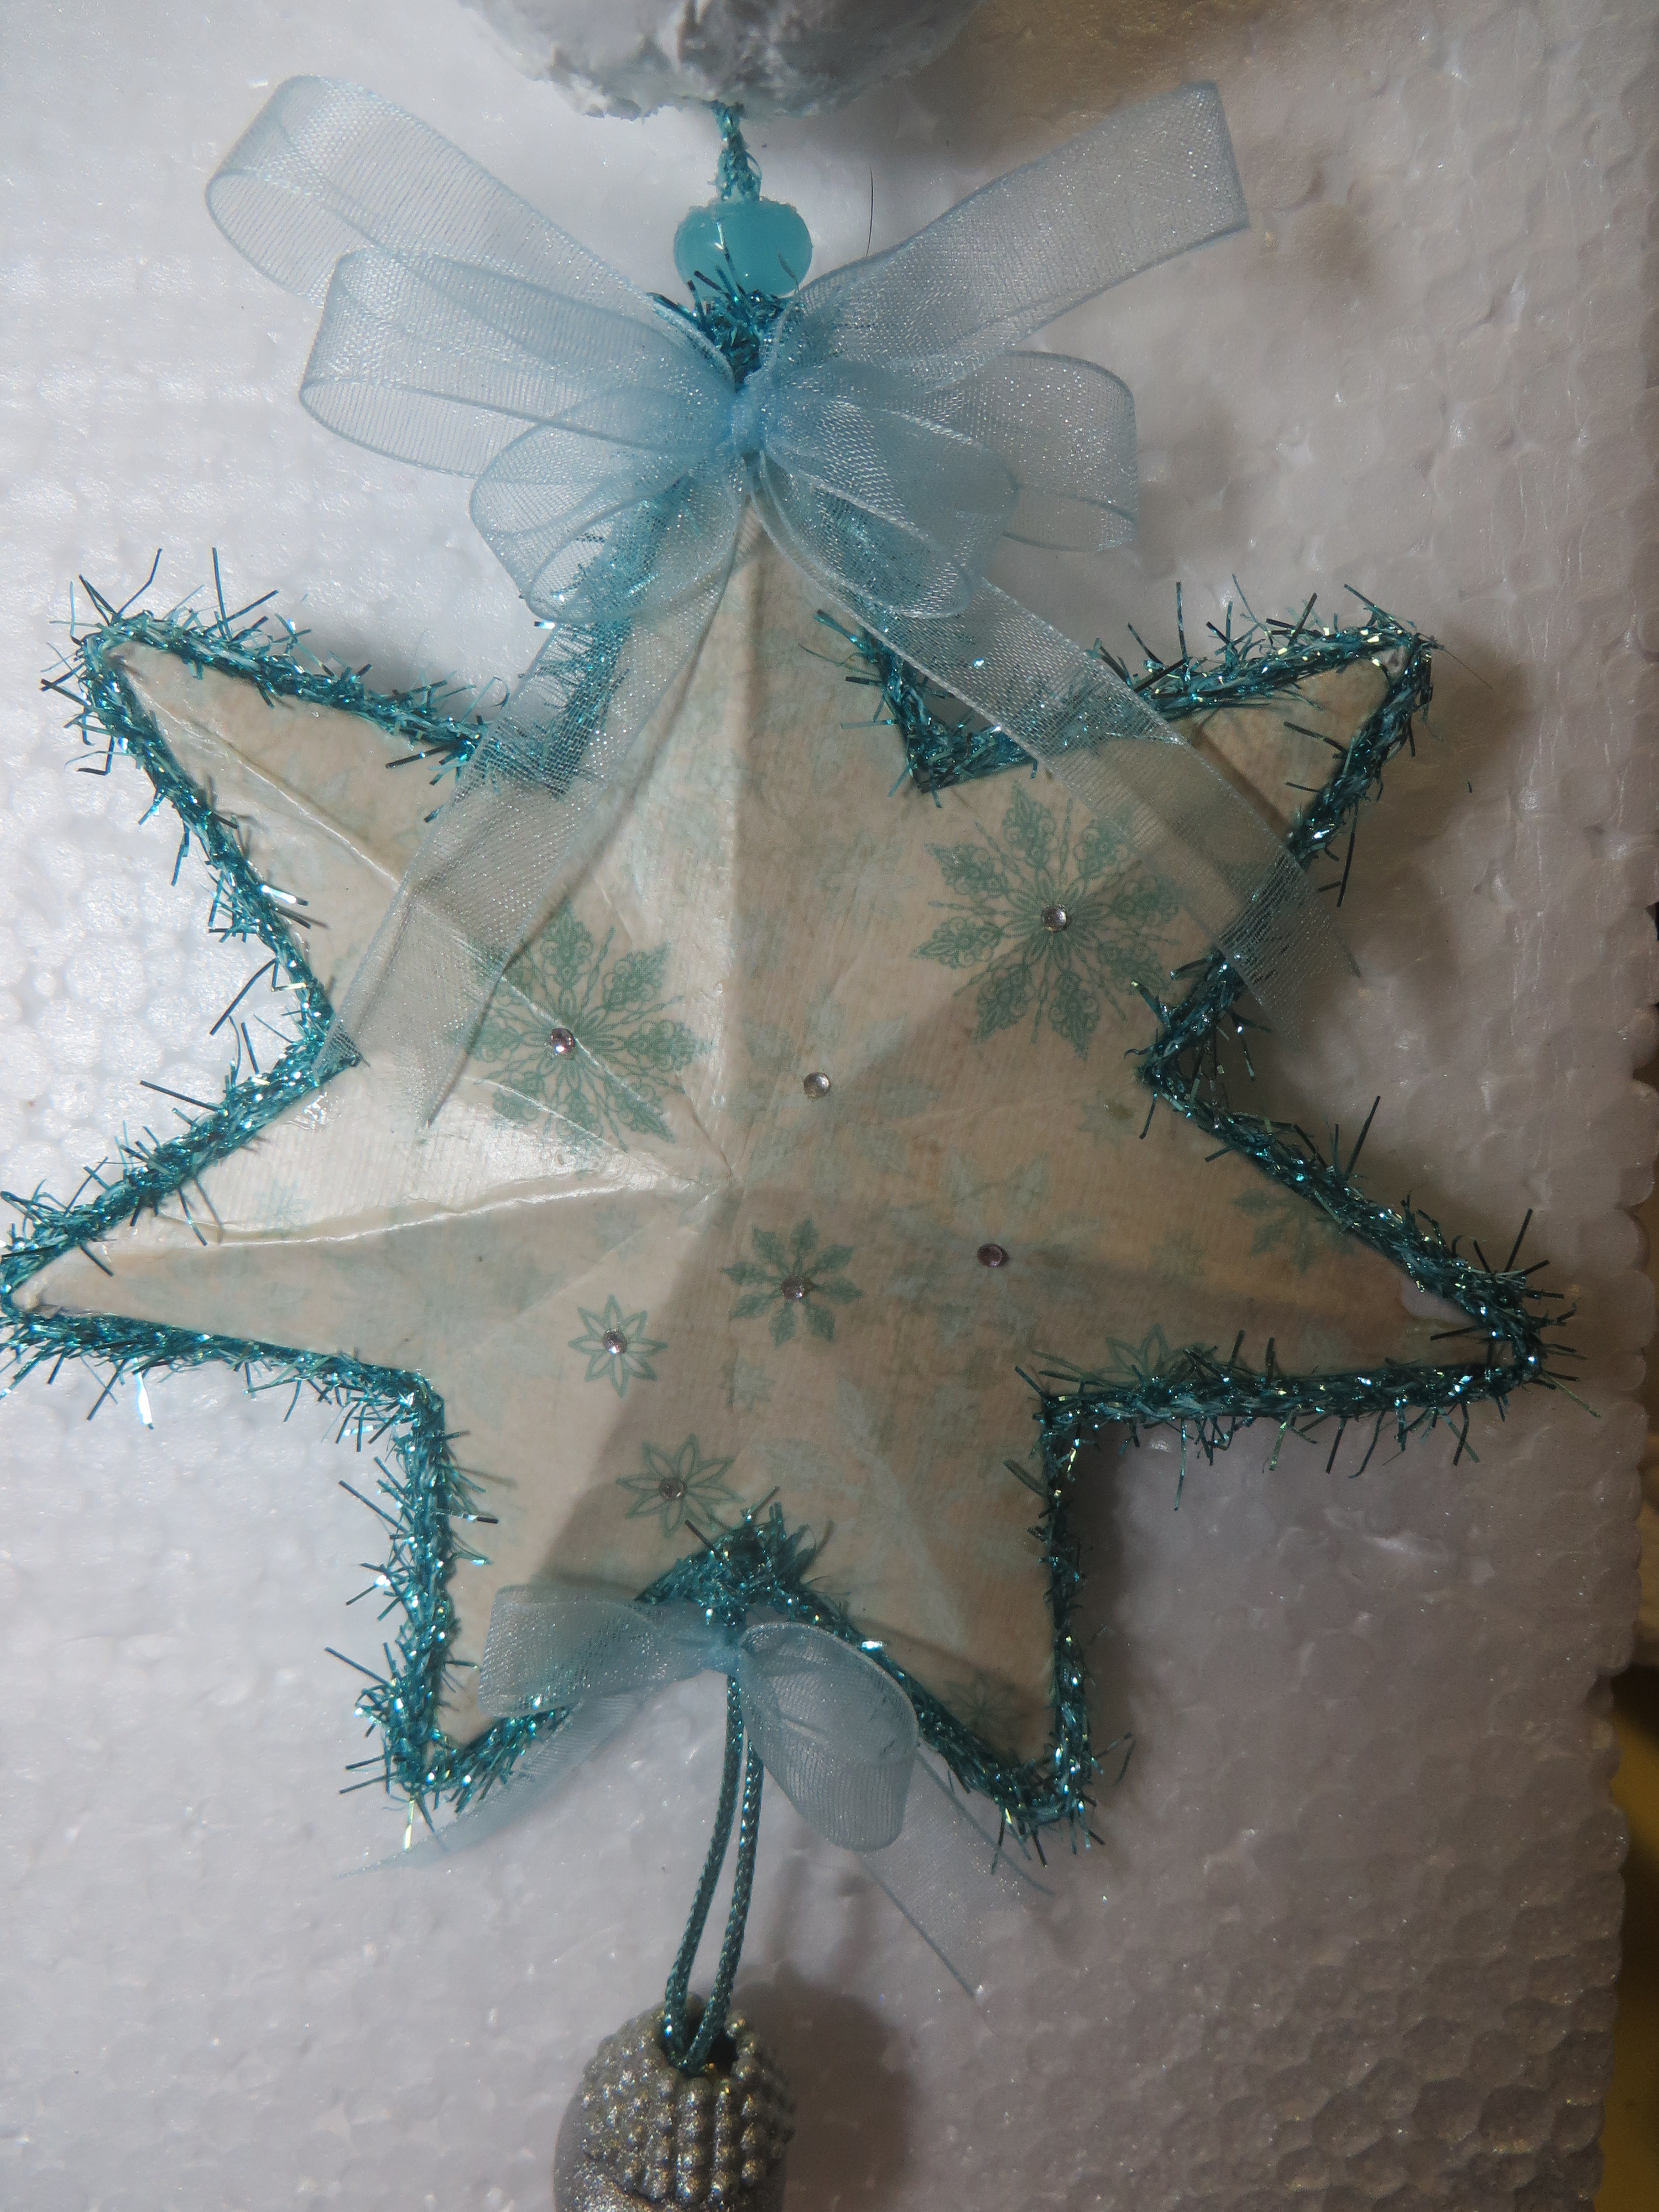
Then I worked on the star. Again, here I think I took the hard way so if you are recreating him, I think there must be easier ways.
I used the nested Sizzix star dies and my big shot. I cut two stars out of chipboard in the ultimate size I wanted – approx. 5 inches across. Then I cut two out of the patterned paper in the next size up because I wanted to wrap the paper around the edges of the chipboard. In the long run, I am not sure that was worth all of the trouble and effort as I put the tinsel around the edge. I was afraid to put the paper on the chipboard before cutting because of the scoring and bending I was going to do to make the star 3D – I was afraid the paper would split or crack. You may want to give it a try and see what happens because I had a tough time. I scored all of the valleys on the front of the chipboard and all the points on the back, then folded the scores to make the center pop up.


I clipped the cardstock stars all around the edges so I would have tabs to fold around the chipboard edges and I attached the cardstock with decoupage. I had a terrible time with the decoupage drying quickly, then my fingers got sticky and they kept peeling the paper. I was making the blue ones and some red ones but the red ones got ruined and I was not able to finish the second ornament as planned (sniff sniff – I’m so sad, I really want one for myself – I’m quite tempted to keep this one! Only kidding Shirley.) I tried doing small areas at a time and washing my hands multiple times but it was just a mess! I was really surprised the blue ones turned out as well as they did.

When dried, I glued them all the way around the outside. Don’t forget to put the cord down the middle before you put them together. Again, I wasn’t sure where I was going to end up so I just left really long pieces of cord on both top and bottom of the star but in hind sight I would have threaded it up through the head and hat and back down again and then down to the bell at the bottom and back up again and tied a knot and hidden it inside the star. As it was I fought to tie a knot at the top of the hat and get the end back into the hat – then tie a knot at the bottom and stick the end into the star – all while keeping everything at the right lengths etc — it was frustrating! After gluing the stars together, I glued the tinsel all around the outside of the star.
Then I took a long doll making needle and ran the cord up through a blue bead to keep the head from sitting too far down on the point of the star, then through the center of the head (after deciding what looked best for the face) and up through the hat. I made the hat by cutting a 5 inch circle of the patterned paper and then I removed 1/4 of the circle (like you would cut a pie), then curled the rest into a cone and glued it up the seam. I glued the tinsel around the top and bottom. Then I found an old 1/2 inch blown glass ornament that was the perfect color that I used like a pom pom for the top of the hat. I used 1/2 inch organza ribbon and tied a triple bow for the neck and it was funny, I tied it and didn’t like it for some reason. I also had another ribbon so I showed all to Mom for her opinion and asked if I should retie the organza bow without the biggest loop and she said no, she liked it and turned it over and put the big loops on top instead of the small ones!! How simple – and I love it! I sat there stewing over it for about an hour, and she looks at it and poof, has the right idea!
The bell on the bottom was part of an old string of gold bells I had and I spray painted it “hammered silver”. As I said, the face was last, and it gave me fits, I could not get things to look even. Thanks again Mom for helping – I don’t know what I would do without you, you are the best crafting buddy. The nose is a button I have had for about 20 years. I marked where the shank of the button was hitting and used my knife cut carve a little slit/hole to fit the shank in and then glued the carrot button on the face. The eyes and mouth are just enamel dots from my scrapbooking stash – I stuck those on with tear tape (red line tape) as I did not want to trust the glue they come with. Oh, and I stuck gems on some of the snowflakes on the stars and the hat so there is some glitz to him. Well that is that. I hope you like him and I hope I did OK on my first tutorial, even though there were some hitches along the way of the actual process. Please let me know what you think and let know if you have any questions and I will be happy to help any way I can. Thanks for visiting my blog and our Ornament Exchange and there is still more to come so come back to see the rest.


Pingback: 2015 Ornament Exchange - Weekend Craft
Pingback: DIY Chilly The Snowman Ornament
Pingback: 2015 Ornament Exchange Link Party | DIY Adulation
Pingback: 2015 HUGE Holiday Ornament Exchange Link Party!
Pingback: 2015 Ornament Exchange – Day 7
Pingback: 2015 ORNAMENT EXCHANGE LINK PARTY - Our Crafty Mom
You sure put a lot of work into creating this fun ornament. Thank you so much for participating in the 2015 #ornamentexchange
LikeLike
I love that you made this entire ornament from scratch. I love handmade ornaments and can appreciate the effort you put into creating this for your exchange partner.
LikeLike
Thank you so much for noticing and I enjoyed participating. Thank you for organizing the exchange – I can’t wait for next year!
LikeLike
Pingback: 2015 Ornament Exchange Link Party | Nets Blog About JnetsLine
Pingback: The 2015 Ornament Exchange! - DIY Just Cuz
I just love your ornament. Looks good.- Mama’s Journey
LikeLiked by 1 person
Thank you so much Amy! Have a wonderful day.
Happy Crafting.
Jeanette
LikeLike
Pingback: 2015 Ornament Exchange Link Party
Pingback: 2015 Ornament Exchange Link Party | Flourish & Knot
Pingback: 2015 Ornament Exchange Link Party - Munofore
Pingback: Playfully Tacky | Ornament Exchange Link Party Time
Pingback: Ornament Exchange 2015 Link Party - Tulips & Orchids
Pingback: 2015 Ornament Exchange Link Party | Amber Downs
Pingback: Gang’s All Here! The FULL Ornament Exchange - Happily Ever After, Etc.
Pingback: Intercambio de adornos y fiesta de enlaces - Sweet Things
Pingback: Ornament Exchange - Sweet Things
Pingback: 2015 Christmas Ornament Exchange and Link Party » Simply Kelly Designs
Pingback: The 2015 Ornament Exchange LINK PARTY!
Pingback: Holiday Ornament Exchange Link Party! | HOME ON THE CORNER
Pingback: Christmas Ornament Link Up - Fearlessly Creative Mammas
Pingback: 2015 Ornament Exchange Link Party - Displaced Yinzer
Pingback: 2015 Ornament Exchange Link Party! - My Pintervetures
Pingback: 2015 Ornament Exchange Link Party - simple.pretty.life.
Pingback: 2015 Ornament Exchange Link-Up (Link Yours, Too!)
Pingback: 2015 Ornament Exchange Link Party - Craving some Creativity
Pingback: 2015 Ornament Exchange Link Party - C'mon Get Crafty
Pingback: 2015 Ornament Exchange Link Party - Inside the Fox Den
Pingback: 2015 Ornament Exchange Link Party | The Blue Willow House
Jnetsline,
I love the way you created your snowy ornament. It is something I have wanted to try but have not. Now that I have instructions it should be a breeze.
Happy Creating,
Karen Marie
LikeLiked by 1 person
Thank you so much Karen. Please don’t hesitate to contact me if you have any questions when you do make one. Good luck and have fun.
Happy Crafting,
Jeanette
LikeLiked by 1 person
What a neat little snowman! Your design is delightful.
LikeLiked by 1 person
Thank you very much!
LikeLike
Wow! You really put some time into your creation! It turned out great! I am participating too and it’s fun to see all the different ideas!
LikeLiked by 1 person
Thank you for noticing! Yes – it did take me quite a while but it was worth it. I love your blog and your style. Your acorn garland particularly interested me as I am originally from CT (now in TX) and our acorns are round – I have never seen them like yours – they look like ice cream cones! Can’t wait to see what you have in store next.
LikeLike
Thank you so much for taking the time to check out our blog! Yes, our acorns are California Black Oak, I believe. All I ever see on blogs are the round ones! We appreciate your visit!
LikeLiked by 1 person
Hello I am a fellow ornament exchange participant popping by. Your ornament is so clever and cute!
Have a wonderful day.
LikeLiked by 1 person
Thank you so much! You have a great day too!
LikeLike